How to Convert PowerPoint to Video for Windows & macOS

We all get used to sharing videos via messengers and platforms like YouTube. But what if you want to share your powerpoint presentations? The solution is easy – just convert your slides into a video. Converting PPTs to MP4 videos isn’t rocket science, and in this article, you’ll learn how to do this in PowerPoint itself – whether you’re a Windows or a macOS user.
It’s possible to turn your slides into MP4 format right in PowerPoint if your version is 2010 or later, if preserving all effects is not hugely important. Otherwise, you should use third-party video converters.
Let’s see what you can do with the default version of PowerPoint.
How to Convert PowerPoint Slides to MP4 Video in Windows
- Open the PowerPoint file you’d like to convert. If it’s already open, make sure all your recent changes have been saved by selecting File and then clicking Save.
2. Select File and then click on the Export button if you use PowerPoint 2013 and above, or Save & Send if you use PowerPoint 2010.
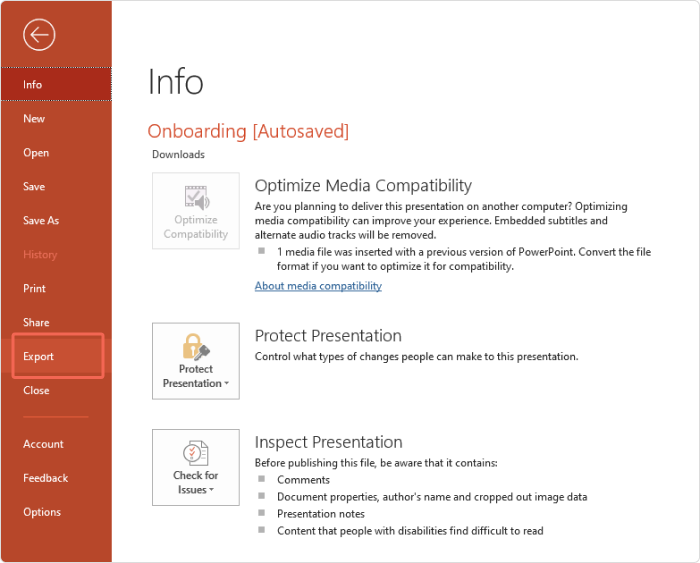
3. Click on Create a Video.
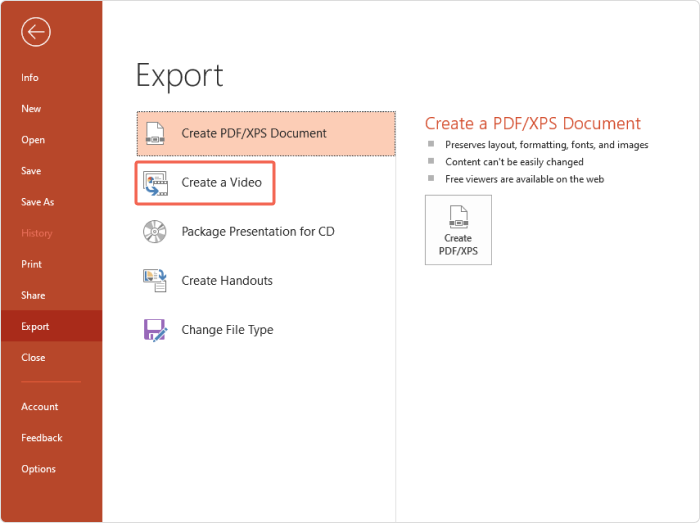
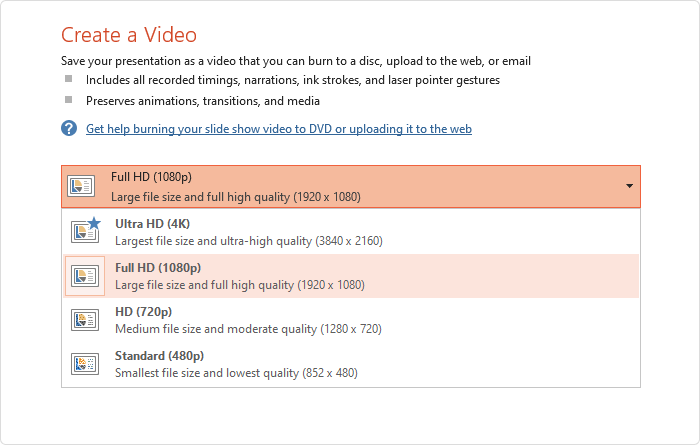
4. Select your video quality. Keep in mind that the higher quality of screen resolution you choose, the larger your video file size will be. If your data storage is limited, you might want to choose low video quality.
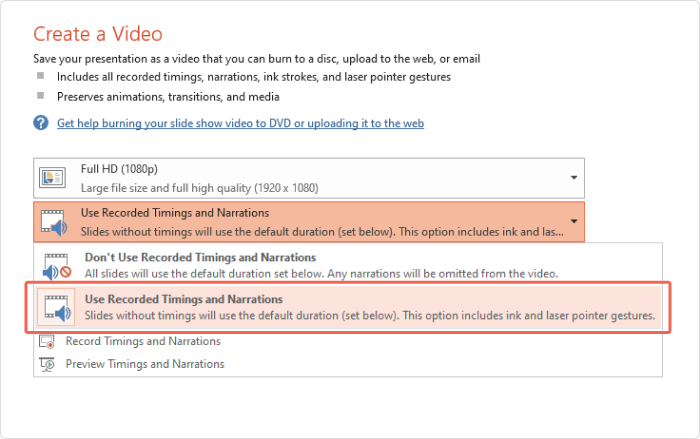
5. If you have timings and narrations and want to have them in your presentation, click on Use Recorded Timings and Narrations. You can also record narrations at this point by selecting Record Timings and Narrations.
6. Now, set the amount of time you want each of your slides to display.
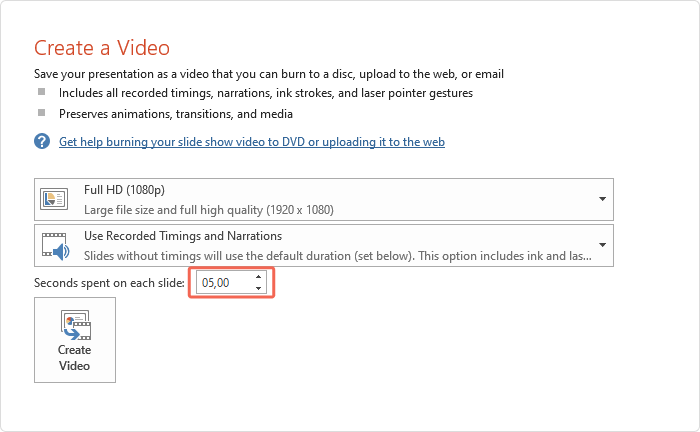
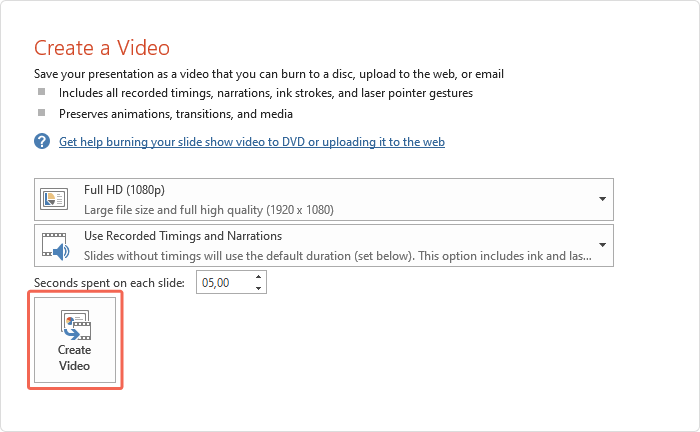
7. Check all settings to make sure everything’s been set up correctly. Once you’ve done that, select Create Video.
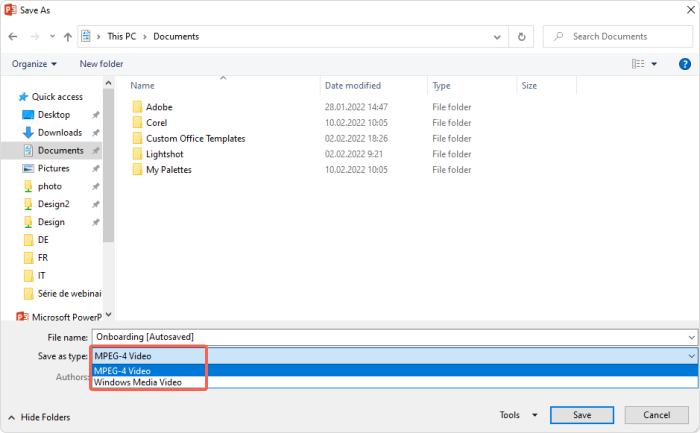
8. Select a location to save your presentation and the video format. PowerPoint offers two format options: MPEG-4 Video (MP4) and Windows Media Video (WMV). If you need a different file format, use another video converter software.
That’s it! Just wait for the conversion process to finish, and your presentation will be ready.
How to Convert PowerPoint to MP4 Video in macOS
- Open the PowerPoint presentation you’d like to convert. If it’s already open, make sure all your recent changes have been saved by selecting File and then clicking Save.
2. Select File and then click the Export button.
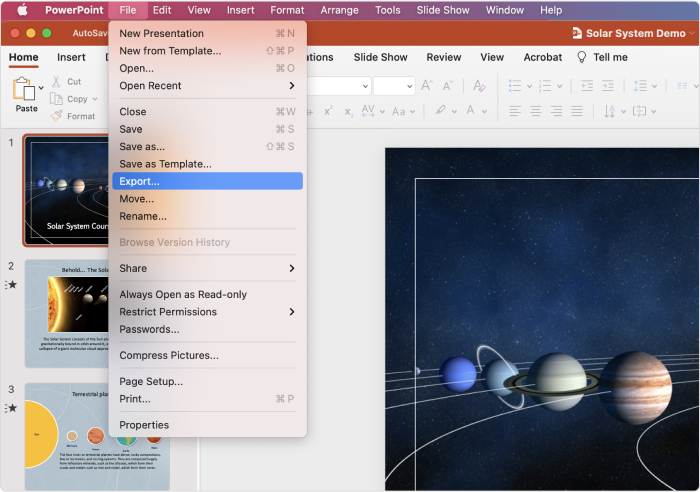
3. Select your video format in the File Format drop-down menu. PowerPoint offers two format options: MPEG-4 Video (MP4) and MOV. If you need a different file format, use another video converter software.
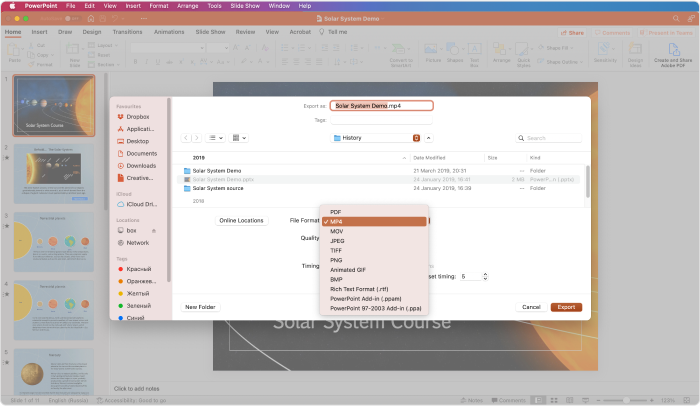
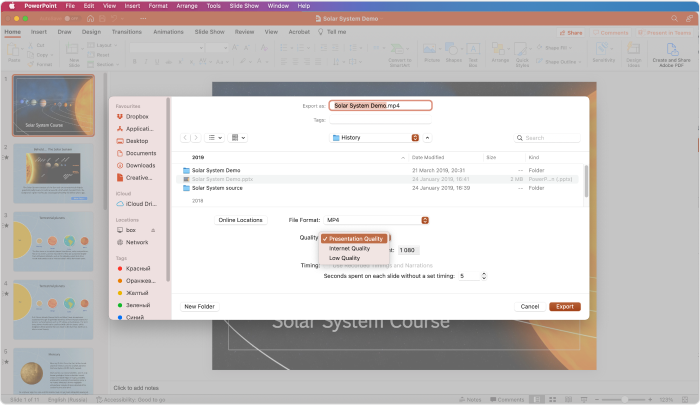
4. Select the quality of your video in the Quality menu. Keep in mind that the higher the quality of screen resolution you choose, the larger video file size will be. If your data storage is limited, you might want to choose low video quality.
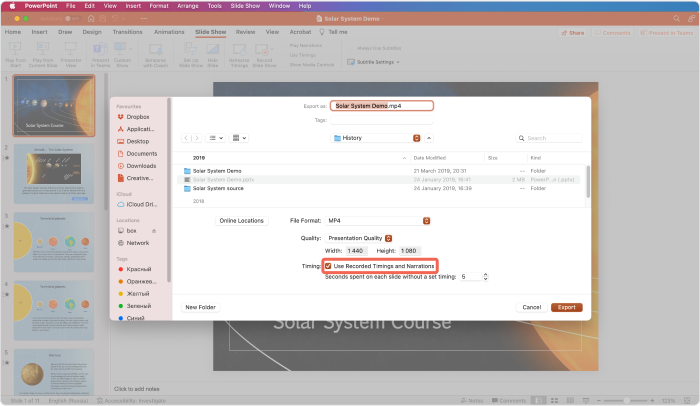
5. If you have timings and narrations and want to have them in your MP4 presentation, click on Use Recorded Timings and Narrations.
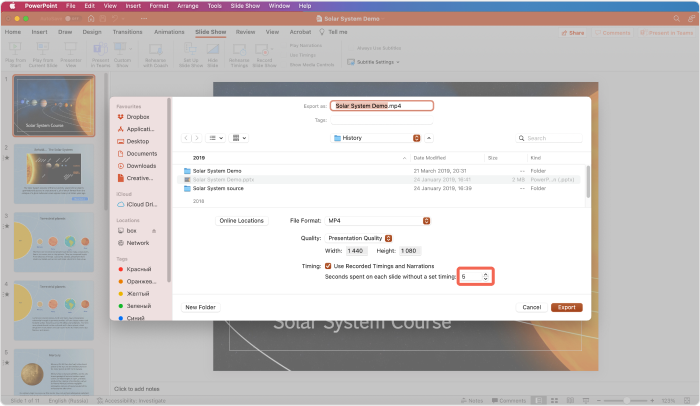
6. Now, set the amount of time you want each of your slides to display. You can increase or decrease the time using up or down arrow next to Seconds spent on each slide without a set timing.
7. Check all settings to make sure everything’s been set up correctly. Once you’ve done that, select Export.
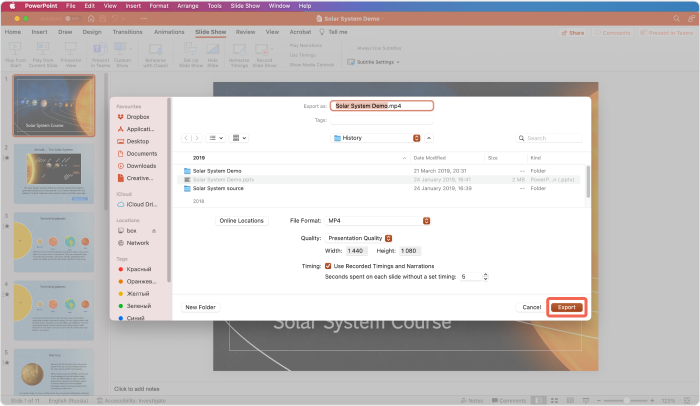
That’s it! Just wait for the conversion process to finish, and your MP4 presentation will be ready.
Converter PowerPoint to MP4 with Sound and Effects
It’s great to have the conversion feature included in PowerPoint itself, but we’ve found that the timings of slide transitions in a video slideshow that was converted this way may be off. If you want your PPT effects to remain unchanged in a video presentation, download a free iSpring Converter Pro trial, convert your slides to video in a few clicks, and get a high-quality MP4 presentation that displays all original effects and animations, and keeps timings intact.
Good luck!
Frequently asked questions (FAQs) regarding how to convert PowerPoint presentations to video
Why Convert PPT to MP4 Videos?
There are three main reasons you might need to convert PPT slides to MP4 videos:
- You’d like to share your files on social media, blogs, or video sharing sites.
- You’re interested in protecting your powerpoint file from modification and repackaging by someone else.
- You want a wide array of video supporting devices like Smart TVs, tablets, and smartphones to display your slides flawlessly.
Will animations and transitions be preserved in the converted video?
It depends on the conversion method you use. Some converters retain animations and transitions, while others may not. It’s important to choose a converter that supports this feature if you want to preserve them.
Are there any recommended settings for optimizing video quality during conversion?
It’s advisable to select a resolution suitable for your target platform (e.g., 1080p for YouTube). Additionally, consider adjusting settings like frame rate and bitrate for optimal quality.


