How to Create a Video for an Online Course in Just 7 Simple Steps

A video can speak a thousand words. It can grab attention, foster engagement, and stick in viewers’ minds in a way that text or image alone simply can’t. Therefore, it’s no wonder that teachers and Learning and Development professionals have embraced video as the “medium of the moment.”
In this article, we explore the benefits of instructional videos, guide you in how to record a video for a course, and list the best tools for video recording and editing.
Why Create Videos for Online Courses?
In short, videos can help you provide better training for your employees. A learning course may be created entirely in the video format or include just shorter video clips. Whatever method of creation you choose, here’s why you should adopt videos for learning:
1. Improve learning experience
Videos are the ideal medium for storytelling, to capture learners’ attention and keep them interested. Viewers have the chance to see, hear, and immerse themselves in training content, tapping into different learning styles for an optimal learning experience.
Also read: The Ultimate Guide to Lecture Capture: How to Get It Right
2. Boost learner retention
Instructional videos can stimulate the brain to remember key messages. GIven that 90% of information transmitted to the brain is visual, and visuals are processed 60,000 times faster in the brain than text, it’s not surprising that tutorial videos are highly effective in increasing learner retention.
Adding video to an online course gives the learner the best chance of retaining the content, not only in the short term but also in the long term.
3. Spark trust and rapport
Videos—especially talking-head videos presented by someone viewers know and respect—help students to connect with the instructor. Forging a connection with learners won’t just make them more engaged—it also makes it easier to convey feelings and build trust with the viewer.
4. Simplify complex concepts
The beauty of videos is that they can convey a lot of content in a short time. It’s an easy way to share everything, from general information to industry-specific information. For example, if you want to explain to employees how to use the CRM, a video tutorial will be more effective than a lengthy document of instructions.
5. Reduce training costs
Video is a powerful learning tool that can increase the effectiveness of training and reduce overall costs. Organizations can save big by replacing costly instructor-led training with video tutorials.
Microsoft is a great example of this. It created a dedicated employee eLearning portal with online courses featuring videos, and in doing so slashed training costs from $320 per employee to just $17, without reducing quality. Microsoft estimates that creating an employee video training portal saves the company around $13.9 million every year.
Types of Videos for Online Courses
Depending on the training goals, the topic of the course, budget, available resources, and sometimes just personal preference, you may want to use different types of videos. Here are four of the most common types, and the contexts in which each one shines:
Talking head videos
Talking head videos usually feature a presenter or instructor who speaks to the camera. The speaker can take up the full frame of the camera’s view or be located off-center to show off background slides. Talking head videos are one of the simplest formats to make. You need very little in the way of visuals and props.

These videos are especially effective in onboarding training for a remote workforce. For example, including a welcome video message from the CEO highlighting the company values, mission, and culture helps new employees connect to the company.
Find out more about creating talking head videos →
Screencasts
A screencast records your computer screen and is often accompanied by a voice narration. You can select to capture your full screen or just a section. The video shows viewers every step you take. To add a personal touch to your screencast, complement it with a presenter video.
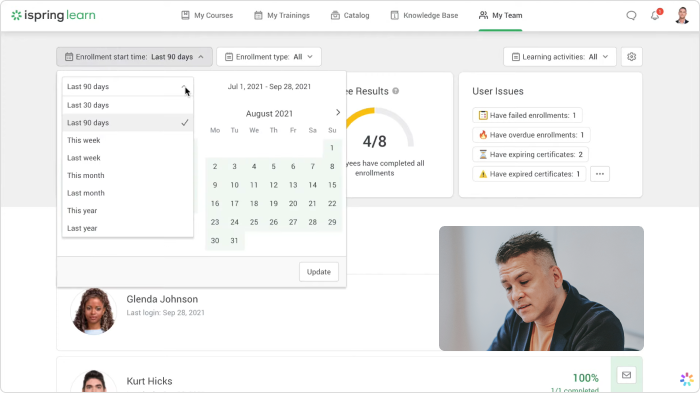
A common use of screencasts in eLearning is to train employees about using company software—for example a learning management system or project management tools. Learners can see how the software works and what they need to do to perform certain actions.
Tip: If you are making a screencast, you can use a picture-in-picture (PIP) frame so that your face appears in the corner of your screen, to personalize your talking head video. Don’t forget to support key points by adding visuals to your background.
Find out more about creating screencasts →
Animated videos
Animated videos capture learner attention, leverage storytelling to bring emotion to the topic, and create a fun learning experience. Some popular types of animated videos include whiteboard animations, character-based animations, cartoon-style animated videos, 2D animations, and animated infographics.

Animated videos are an especially effective way to breathe fresh air into seemingly dull topics. For example, you can convert boring security training into a dynamic course by creating an animated superhero-style character who needs to spot security dangers in the office.
Interactive videos
Interactive videos require users to interact with the training material by clicking on hotspot areas to reveal more information. For example, viewers can click different buttons to take alternative routes through the video, or choose what the character does next.

Interactive videos are a great way to simulate real-life situations and teach learners how to behave. For instance, the Resuscitation Council (UK) made an interactive film called “Lifesaver” that teaches people how to save someone who is suffering cardiac arrest.
7 Steps for Creating Attractive Videos for Online Courses
Developing videos can seem like a daunting task, especially if you aren’t a professional video producer. Fortunately, there are tools that allow you to make professional videos on your own, even with no prior experience.
Whether you want to make a short training video for your course or a full-blown video course, this guide gives you the lowdown on the creation process.
Step #1: Carry out a learning analysis
All successful training videos start with a comprehensive learning analysis that will help you define two key factors:
- The goal/objective of the video
- The audience
Determining the goal of the video clarifies what viewers should know after watching it. This enables you to research the topic and gather the necessary information.
Defining the audience helps you tailor the video content to the learner. You can decide how in-depth the content needs to be, or if certain steps can be skipped because the learners already have a good understanding of the topic.
Step #2: Prepare content
After completing the learning analysis, you will need to define th type of video you will create and prepare the video content. If this seems overwhelming, we recommend breaking it down into smaller stages:
Start with an outline. Gather all your research and decide what needs to be included in the video and what can be cut. Analyze all the content and make sure it’s in a logical order that doesn’t skip steps or confuse learners.
Storyboards are a visual outline of a video or course. They act as a master plan or a bird’s-eye view of the whole process. For video creation, storyboards are often a sequence of shots.

Now write your script. There are different ways to accomplish this. You could write a full script and speak it almost word-for-word. This option is great because you won’t miss any key points. But if the presenter isn’t experienced, it can be quite obvious that they are reading a script and come off sounding a little stiff.
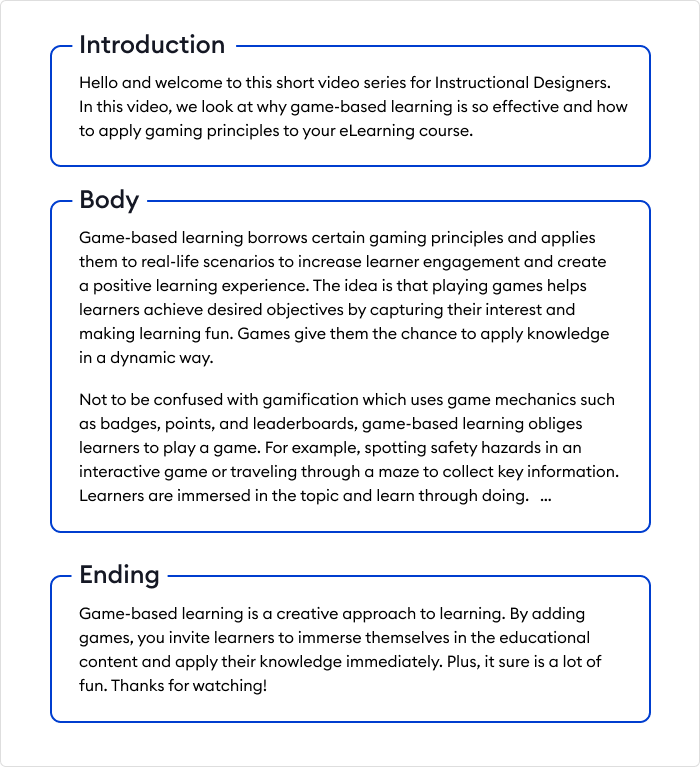
Tip: Always read the script out loud to make sure it flows and check the timing. Add annotations to remind yourself where to pause, where to slow down, and where to emphasize. Include any important directions such as where the presenter should be standing, or when they should look at the camera.
Finally, prepare any additional content such as visuals, slides, or props that you may be using.
Step #3: Set up your recording space
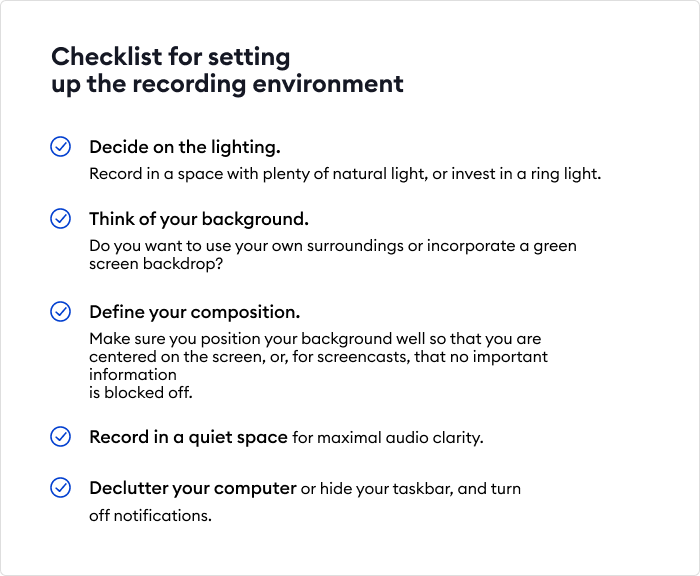
This step is crucial if you’re going to create a talking head video. Recording in a messy environment not only affects the quality of your video, but it can also be distracting. So take some time to visualize how you want your recording environment to look.
If you’d like to create a talking head video or a screencast, download iSpring Suite Max. The video-making process is super-simple with iSpring. All you need is a computer with the software installed, a microphone, and a USB webcam. If you are short on time or budget, you can even skip the microphone and webcam and use your laptop’s built-in mic and camera. Once you have your devices in order, simply open the video recorder, and iSpring will automatically detect your equipment.
Step #4: Record your video
Action! It’s time to record. Open iSpring Suite and click on Create.
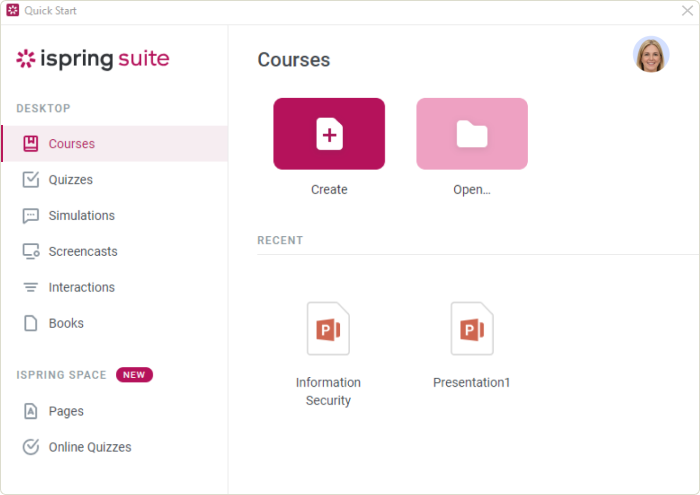
PowerPoint will open, and you’ll see the iSpring Suite tab on its ribbon. Click Screen Recording → New Recording.

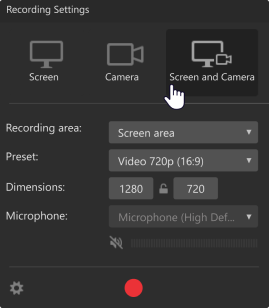
In the opened window, choose the type of video you’re going to make. For example, if you need to create a talking head video, select “Camera” mode. If you’re planning to have a talking head PIP frame within a screencast, choose Screen and Camera.”
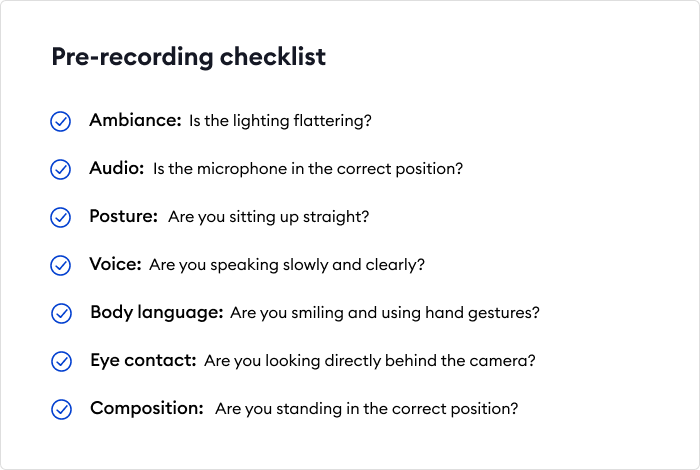
Once you’ve set up the video studio, make a brief run-through to go over your script. Then make sure you’re ready for recording by going through the points in this checklist:
If everything works, press the red record button at the bottom to get started.
Tip: During the recording, pause regularly to catch your breath and let the information breathe. If you stutter or make a mistake, simply pause and take a deep breath, then pick up where you left off. You can cut out mistakes during the editing process.
Step #5: Edit your video
Once you stop recording, the video automatically opens in the iSpring editor.
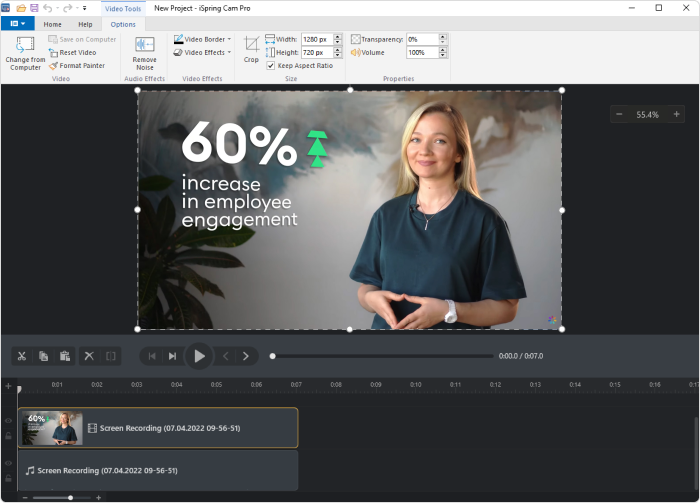
You don’t need to do anything fancy to give a video a professional polish. Just start by editing out anything that may distract learners or make the video look messy.
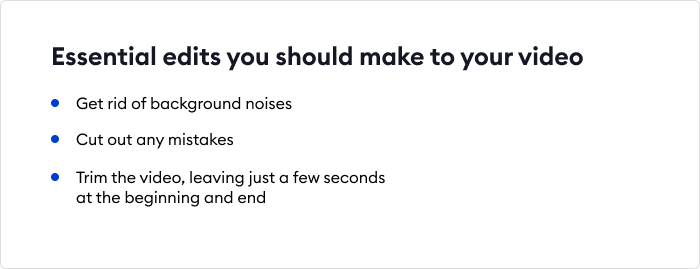
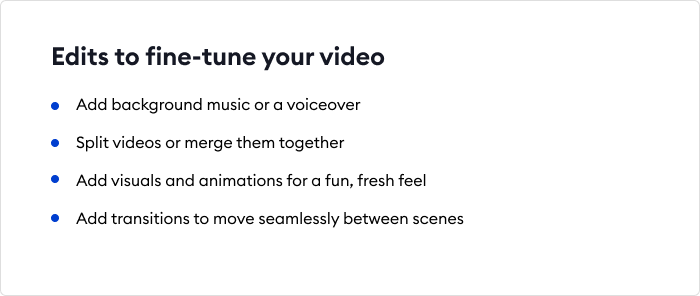
Now that you have tidied it up, play with iSpring’s options to boost learner engagement and create a more dynamic video.
Step #6: Upload the video to your online course
Congratulations! You have just recorded your first instructional video.
If you’re going to create a video course that consists of a series of tutorials, record the other videos and gather them all in a single folder.
You may also want to make a video as part of your slide-based course. This is extremely easy with the same iSpring Suite Max. The toolkit includes not only a video studio, but also a PowerPoint-based tool for creating courses, as well as other content authoring tools. Simply build a course the same way you make a PPT presentation, and upload your video.
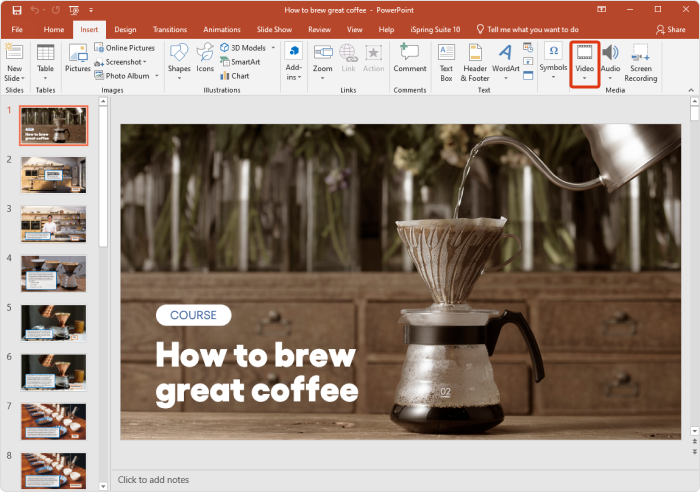
This brief video walks you through how to create an online course in iSpring Suite Max in just 30 minutes:
Step #7: Deliver your online course
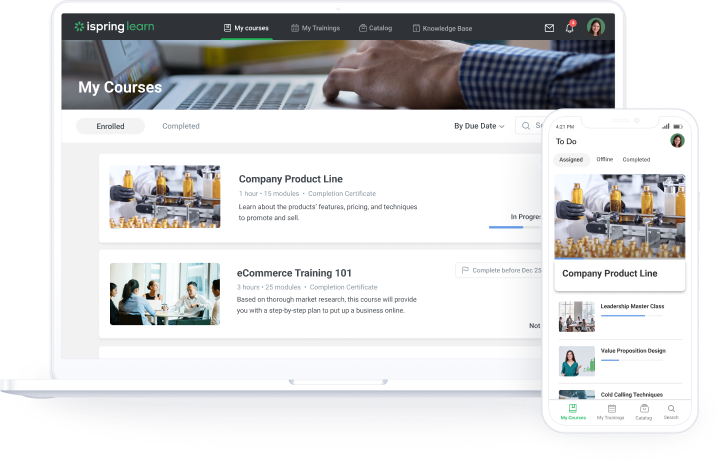
You’re all set, and now you’re ready to share your course! The easiest way to deliver it to your learners is through a learning management system (LMS). This is a system that allows you to upload your courses, assign them to learners, and track their progress. However, you can also add your video tutorials to YouTube or Vimeo, or upload them to your website.
If you don’t have an LMS, try iSpring Learn. It’s a robust learning platform that enables you to automate training management tasks, build personalized learning tracks for online courses, and create custom reports. Learners can easily access online courses, instructional videos, and other learning content at a time that suits them.
5 Tools to Easily Create Videos for Your Online Course
Now that you know how to make videos for online courses, let’s look at some of the best tools for creating an instructional video. We have rounded up five tools for every experience level and budget.
1. iSpring Suite Max
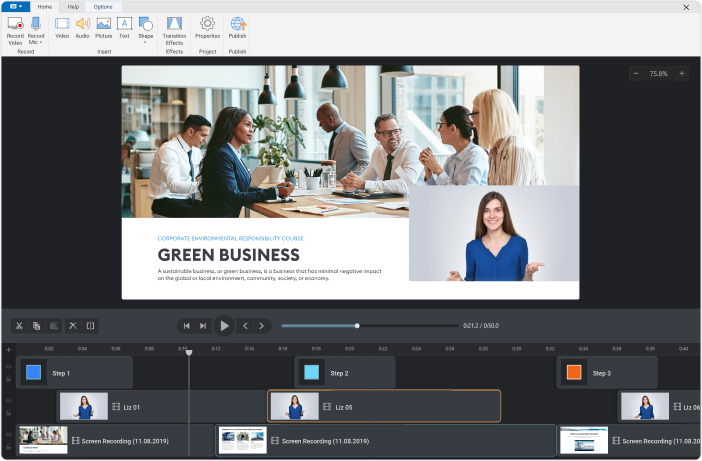
We mentioned this tool earlier in the guide to creating a video for an eLearning course. In fact, iSpring Suite Max is not just a video creation tool—it’s an all-around authoring tool that also allows you to create slide-based courses, quizzes, and dialogue simulations. It uses a simple PowerPoint-based design, so you can create video-based courses in minutes, without any special skills.
With iSpring, you can draw from the extensive library of characters, locations, and templates to personalize your courses, localize content for different audiences, and boost learner engagement with a wide range of interactions.
Cost: $970/year for the complete toolkit. Free 14-day trial →
2. Adobe After Effects
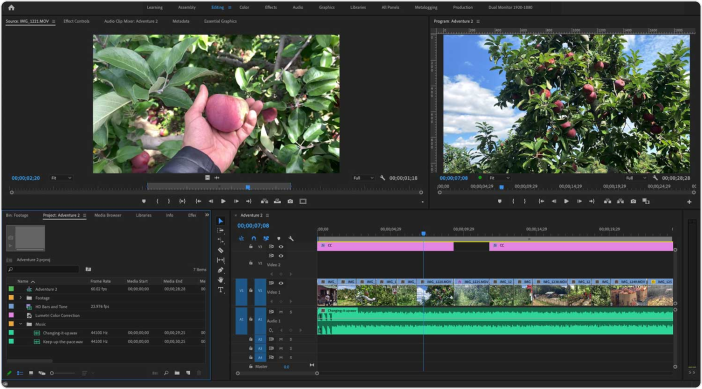
Adobe After Effects is a powerful graphics software program for professional video production teams. It takes extensive training to learn how to use it well, but for video editing pros, there is no better tool. Adobe After Effects is used for animation, motion graphics, and visual effects.
It comes with a whopping 60 million images, graphics, and videos that can be customized to create an original, compelling training video. With the right skill set and a clear vision, you can create any type of video using Adobe After Effects.
Cost: $20.99/month.
3. Filmora SCRN
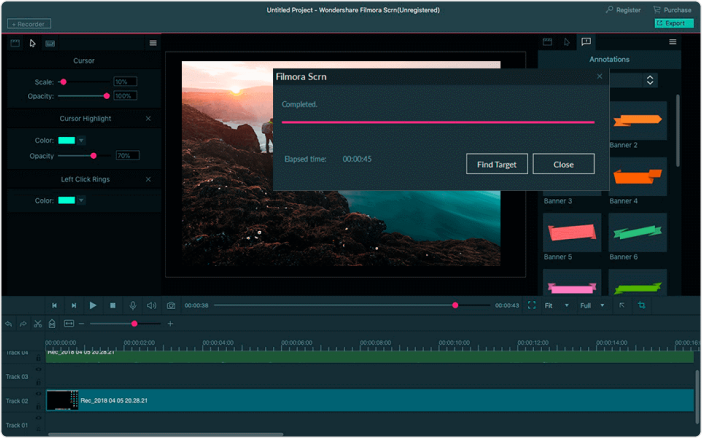
Filmora Scrn is a video tutorial software that can be used to record a screen, a webcam, or both at the same time. The tool boasts some powerful editing features that allow you to quickly edit videos by adding images, annotations, music, or text, and drawing circles or arrows to highlight important information. It also has some more advanced editing options, including frame-by-frame previews and pan zooms. Videos can be exported in a number of formats, including MP4, MOV, and GIF, or shared online.
Cost: $19.99 for 1 year or $29.99 for a lifetime license.
4. Cam Studio
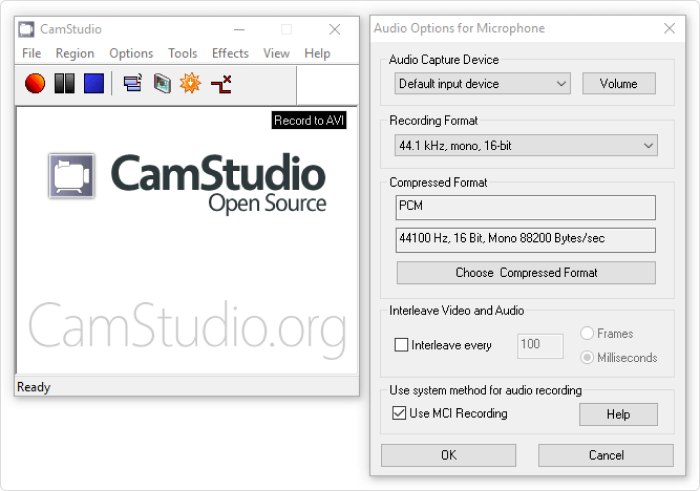
If your budget doesn’t currently stretch to purchase a paid video creation tool, there are some open-source options out there to get you started. CamStudio is a free desktop recorder that’s great for demonstration videos such as software tutorial videos. Its features are more basic than the other options on this list, but CamStudio allows you to record your computer screen and audio to create simple tutorial videos. It also offers some editing options, including annotations, cursor changes, time-lapse footage, and compression, to polish your videos. With CamStudio, videos can be exported in AVI format.
Cost: Free
5. Animaker
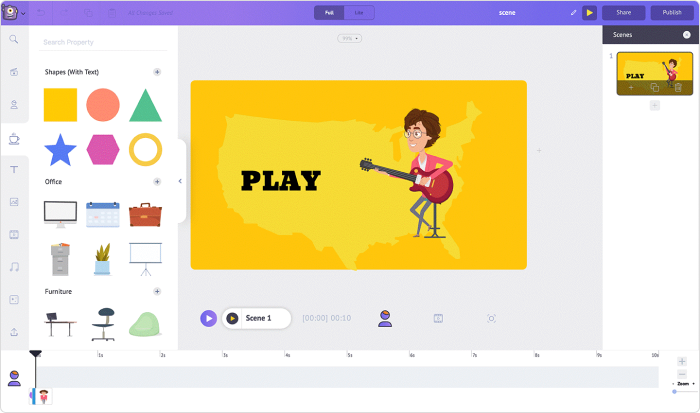
Just as the name suggests, Animaker is an online video tool for making animated videos. The platform has a character library full of animated characters, icons, charts, sounds, and visual effects. You simply pick your characters and select from a range of movements and facial expressions to customize them.
With Animaker, you can easily create different styles of animated videos such as whiteboard animations, infographics, 2.5D, and handcraft. With the paid plan, you can export your videos in a number of formats or share them online. The free plan only allows videos to be exported with the Animaker watermark.
Cost: The paid version starts at $12/year, or there’s a free plan.
How to Choose the Right Video Creation Tool
Here are a few tips about how to choose a video creation tool that suits your training needs, experience level, and budget:
- Choose software you can use right away. Sophisticated video creation software may boast an impressive array of features, but you will need to factor in training time.
- Make the most of free trials. Test drive the software and get a real feel for how it works and what it can do before choosing a tool.
- Check out reviews and ratings. Do your homework before selecting a tool by consulting trusted software ratings and reviews. Honest reviews may highlight potential issues.
- Factor in additional costs. Would you need to buy additional video editing software and a course creator tool? Choosing software that covers all these needs could be more time- and cost-effective.
Final Thoughts
We hope this article empowers and inspires you to record your own videos for online courses, even if you have no video production experience. Training videos add immense value to online courses by boosting learner engagement and improving retention. With the right software, you can build your own compelling eLearning courses, complete with video, interactivity, and quizzes, to give your learners the best training possible.
If you want to create engaging training videos and online courses quickly and easily, test drive the full range of iSpring Suite Max features with a 14-day free trial today.


