How to Email a PowerPoint Presentation: 5 Proven Ways

After you’ve finished creating a PowerPoint presentation – assembling the content, perfecting the design, and adding animations and other special effects – you may want to email it to your students, employees, or clients. There are several ways to email PowerPoint slides, and the one you choose may depend on a few things: the file’s size, security concerns, and whether you want users to be able to edit the presentation. Let’s look at each of the 5 methods in detail.
1. Send as an Email Attachment
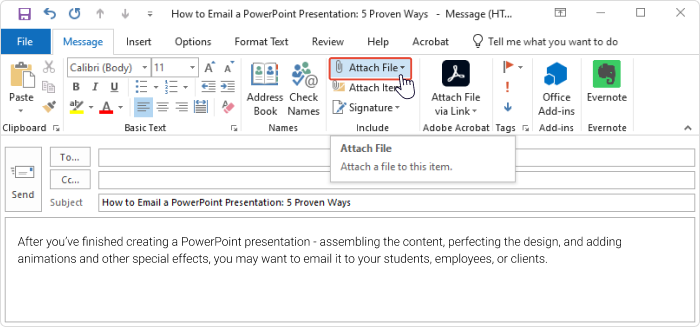
Sending a file as an email attachment is perhaps the first thing that comes to mind when there’s a need to email a PowerPoint presentation.
To do this:
- Save your completed PowerPoint presentation on your hard drive.
- Open your email program.
- Add recipients’ email addresses.
- Click on the attach button (usually represented by a paperclip icon), and navigate to the file on your hard drive.
- Once you’ve found the file on your computer, double-click on the file name or icon and it will upload to your email server.
- All that’s left to do is write the subject and body of your email and click Send.
This method is quick and easy, but:
- It would make the sender vulnerable to plagiarism, as the receiver could copy the content at will.
- Most popular email services cannot attach files greater than 25MB.
- PowerPoint files won’t open on Macs without an additional tool.
- Files created using newer versions of PowerPoint won’t open in older versions of the software.
2. Convert and Share Files in PowerPoint
PowerPoint comes with a host of built-in features to help facilitate the sharing of presentation files. You can send your presentation as an attachment, a link, a PDF file, an XPS file, or as an Internet Fax. To access these features, click File > Share > Email.
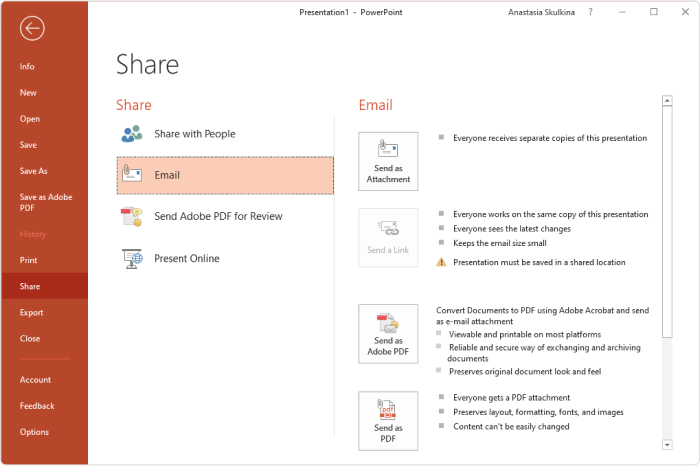
Under Email, select between the following options:
- Send as Attachment, to attach your slides to your email.
- Send a Link, to create an email with a link to your slideshow. But to use this option, you need to have access to a shared location, such as a SharePoint or OneDrive, and save your presentation there. (We’ll address this method in greater detail later in the article.)
- Send as PDF, to save your slides as a .pdf file, and then attach it to an email.
- Send as XPS (Microsoft’s alternative to PDF), to save your presentation as an .xps file and then attach it to an email message.
- Send as Internet Fax, to send your presentation as an Internet fax. For this option, you first need to sign up with a fax service provider.
3. Make It an HTML5 File
You can also convert a presentation that you want to share into an HTML5 file. In this way, your users will be able to open the slides in a browser and view them online. There are numerous advantages to this method:
- In presentations converted into the HTML5 format, all images and videos look the same as they do in the original and all PPT effects and transitions are preserved.
- HTML5 presentations work flawlessly in all operating systems and on all devices, and don’t require any software to open them. Users can view HTML5 slides right in their browsers.
- HTML5 slides are easy to upload to websites or Learning Management Systems.
- Your slides will be safe behind a wall of protections – watermarks, passwords, and time and domain restrictions. Users will only see your presentation when you allow them to.
- Presentations cannot be corrected by outside sources after conversion, meaning that copyrights will be protected.
You can turn your presentations into HTML5 format by using iSpring Converter Pro, which is shipped as a PowerPoint add-in. After installation, the iSpring tab will appear on your PowerPoint ribbon, so you can perform a conversion in a few clicks. Here’s how to do this:
- Download and install iSpring Converter Pro.
- Open a PowerPoint presentation.
- Switch to the iSpring Converter Pro tab on the PPT toolbar and click Publish.
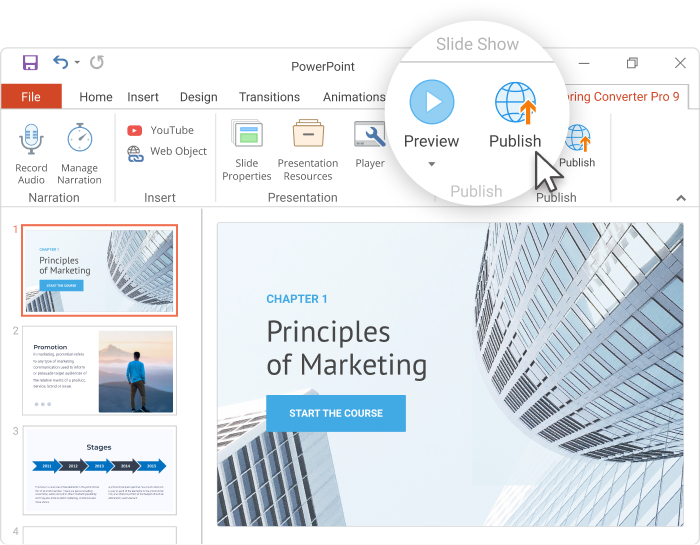
- Select HTML5.
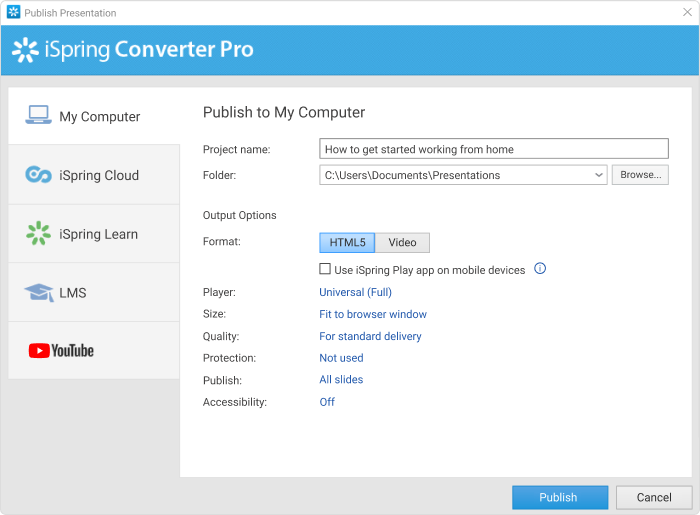
If you want to protect your presentation against unauthorized use, in the window that opens, click the link in the Protection field. You can choose whether to protect the slides with a watermark that will appear on the slides by using a password, time or domain restrictions, or apply all these options.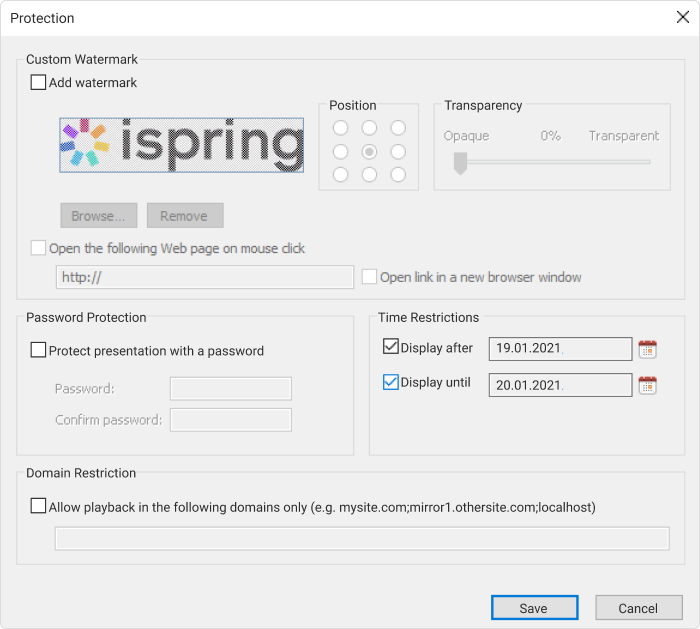
After configuring the settings, save the changes. - Click on Publish.
- After the publishing process is complete, you will see a window that looks like this:
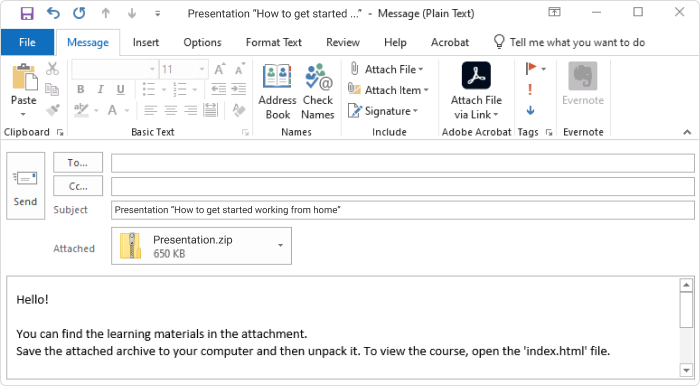
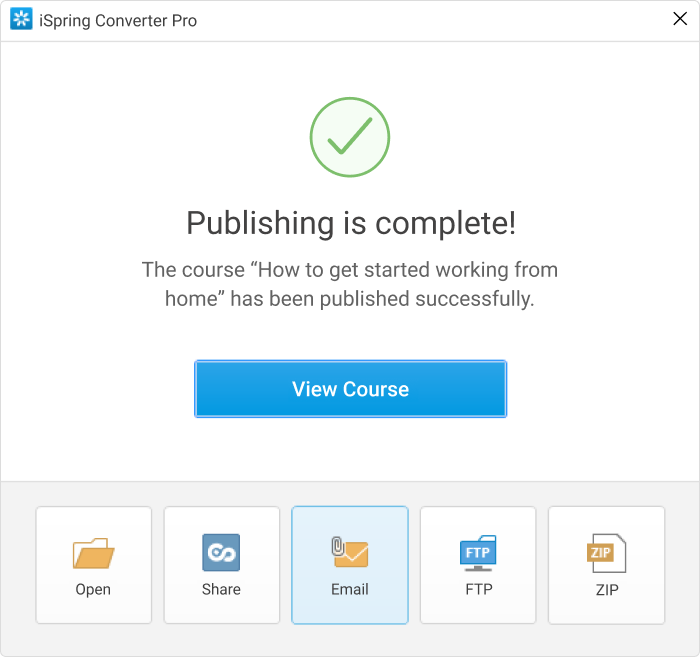 To send your presentation via email, click the Email button. The converter will automatically compress your presentation into a zip archive.
 - Then, a new email with the file attached to it will be created by your default email client. You can now specify the recipient’s email address and send it.
Start your free iSpring Converter Pro trial now →
4. Make It Into a Video
Another way to share your email presentation easily is to convert it into an MP4 file. This is an especially useful method if you want to share your ideas via video by uploading it to a platform like YouTube.
And this is where iSpring Converter Pro will fit nicely again. As with the HTML5 file, after conversion, a video will preserve all animations, effects, formatting, and audio embedded in the source files. iSpring lets you manage presentation specifics like video quality and size, as well as publication to YouTube from within the software itself.
To turn presentation into a video, perform the same steps we covered above but, when publishing, choose Video instead of HTML5.
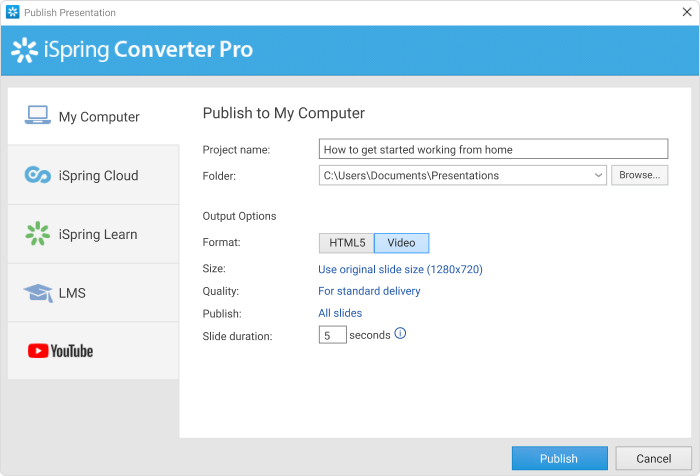
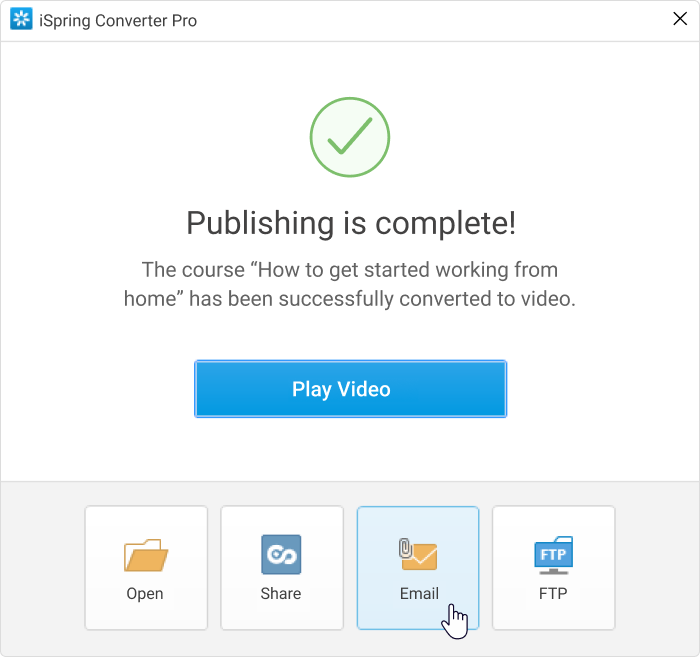
Then you can click the Email button to send the output via email.
If you want to upload your video presentation to YouTube, go to the YouTube tab in the iSpring publishing window.
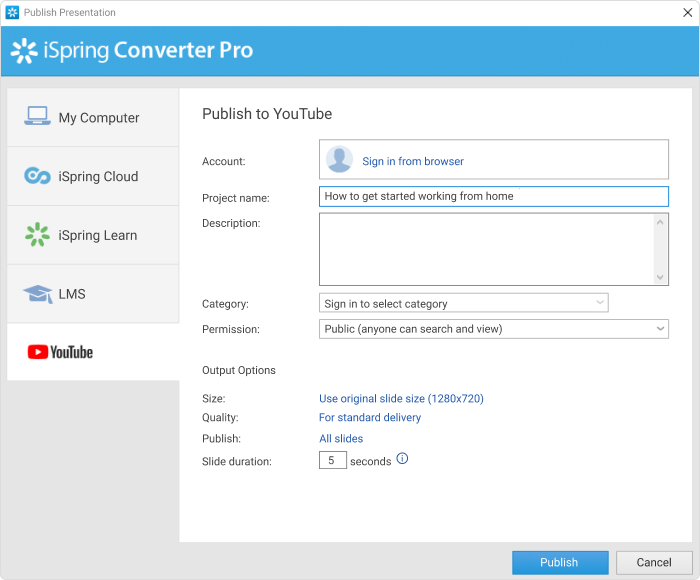
Log in to your YouTube account by clicking Sign In in the Account field, enter information about the video – title, description, and category in the relevant fields – and configure the settings if needed. Then, click the Publish button. After that, you can watch the published video in your YouTube account. The only thing you need to do now is email the link to the video to your users.
See a comprehensive guide on how to publish a PPT to YouTube →
5. Share via a Link
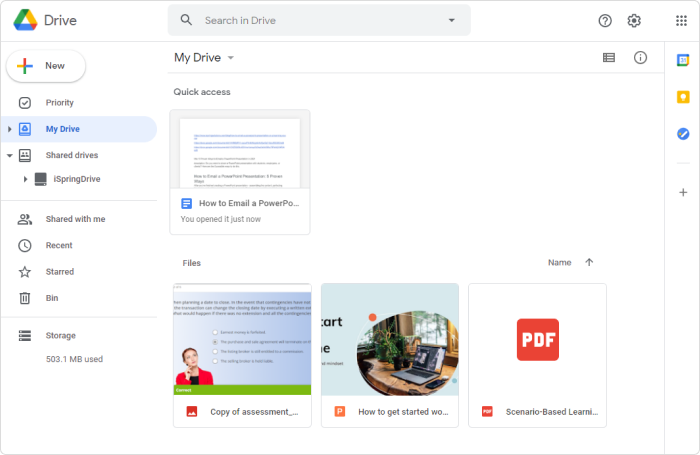
If converting a PPT file to another format is not what you want, but the presentation is too big to email as an attachment, you can always compress it into a .zip file before sending it. Or, instead of emailing the file directly, you can upload it to a file hosting service, like Google Drive or Dropbox, and share it by sending the link to recipients.
To compress large presentations into zip files:
- Right-click on the file in your computer.
- Choose Send to.
- Select the compressed (zipped) folder.
- Log in to your file hosting service and follow the steps required to upload a file and share it via a link. When recipients receive your email, they can click on your link and view the file online or download it to their computers and watch it using the PowerPoint slide show viewer.
Conclusion
Choose the handiest method from among these five for your line of work and presentation needs. Plus, consider the security of the method you use and decide how much control you would like to maintain over the intellectual property in the presentation.
Do you have any other ideas for sharing PowerPoint presentations? Tell us in the comments below!
Useful Resources on PowerPoint
Are you a PowerPoint lover? If so, here are some other helpful articles for you:
- How to Share a PowerPoint Presentation Online
- How to Protect PowerPoint Presentations
- How to Add Narration to a PowerPoint Presentation
- How to Add Youtube Video Into PowerPoint Presentation
- How to Structure a PowerPoint Presentation
- How to Convert PowerPoint Presentation to an eLearning Module
- How to Remove the Background From a Picture in PowerPoint
Fast PowerPoint to HTML5 Converter
Convert presentations to HTML5 with all effects and transitions preserved
