How to Make a Quiz in PowerPoint

Let’s agree that PowerPoint is the hidden gem in Microsoft Office. Using standard PowerPoint tools, you can go far beyond creating presentations. Actually, you can build mini games with animation tricks or a video presentation, or make PowerPoint quizzes with strict navigation parameters.
In this article, we’ll show you how to create multiple-choice quizzes in Microsoft PowerPoint using two methods step-by-step.
How to Create a Quiz Right in PowerPoint (Method 1)
While PowerPoint might not be the first tool that comes to mind when thinking about quiz creation, it can be surprisingly versatile. If you have no other tools at hand, we’ll walk you through the process of leveraging PowerPoint’s features for creating a quiz. If you would like to explore PowerPoint features on your Mac, feel free to learn how to install Windows on it.
How to Create a Multiple-Choice Quiz in PowerPoint
A multiple-choice quiz is the fundamental question type. It offers participants distinct choices, making the answers quantifiable and easy to evaluate. Follow these 5 steps if you want to make a quiz in PowerPoint Presentation:
Step 1: Create the front page of the quiz
Open a new slide in your presentation and type the title of your assessment. Ours will be called “Mt. Everest Quiz.” You can also add some additional textual data like we did.
Add an image that will be in line with your topic. To do this, click the Insert tab and choose Pictures. Or you can do this by simply clicking on the picture icon in the center of your slide.

Step 2. Create the question and the correct and incorrect answer slide
To make a question slide, move on to the next slide and type the question in the text box. Instead of questions, you can also use incomplete sentences, phrases, or mathematical equations. Add a picture that will illustrate your ideas well and serve visual communication.
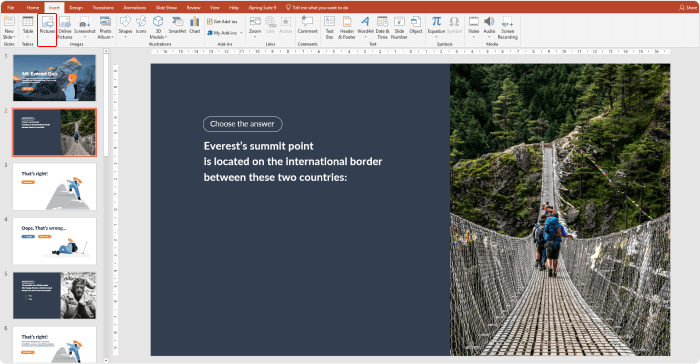
Add reply options to your question. Go to the Insert tab and click the Text Box button. Type in the first option, then continue to add the rest of them in a presentation.
Multiple-choice questions typically contain one correct answer (also called the key) and three wrong answers (also called distractors). However, you are free to add as many options as you like.
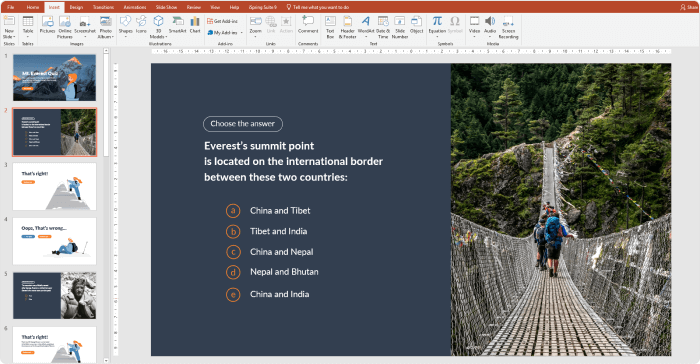
Compose the next question-and-answer slides in the same way.
Step 3: Create the correct answer slide
Add an additional correct answer slide after your first question slide saying that the learner has chosen the right answer. Enter a congratulatory message, such as “Correct answer!,” “Right answer!,” “That’s right!,” “Correct!,” or “Well done!” In the Content box, add a phrase that will encourage students to continue, like “Go to the next question!,” “Continue!,” or “Let’s move on!”
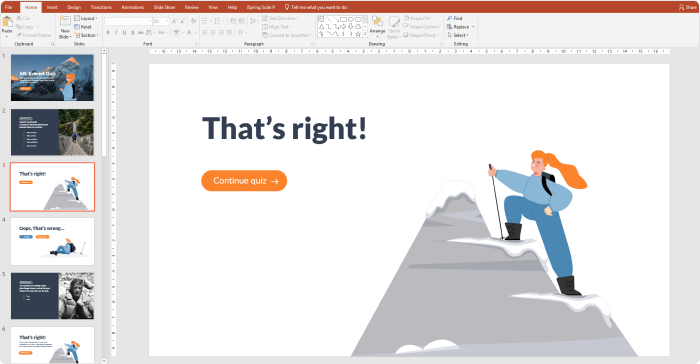
Step 4: Create the wrong answer slide
Add the next slide for the wrong answer, which will be displayed when test takers make an incorrect choice. Add another PowerPoint slide and type in the relevant text in the Title Box, like Oops, that’s incorrect… But this time give your learners a chance to go back to the quiz question slide and try again. So, this is what our incorrect answer slide will look like:
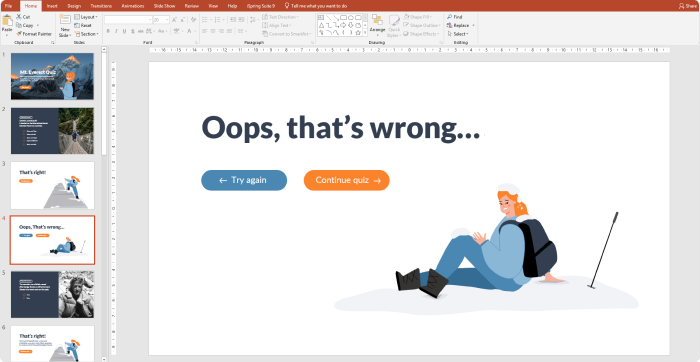
To make knowledge checks even more effective for learners, give feedback on each incorrect answer. Helpful information presented on your feedback slide can explain certain questions and answers in more detail.
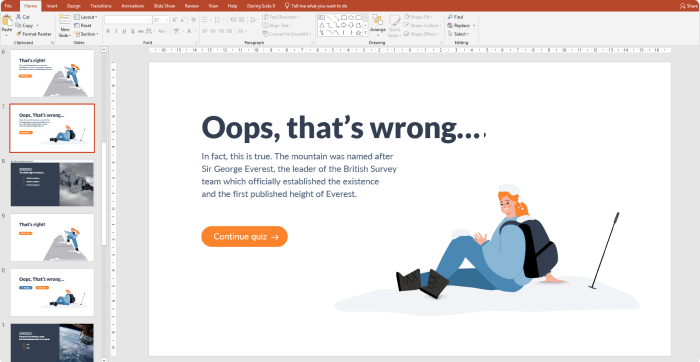
Continue adding the correct and the incorrect answer slides after each question slide.
Step 5: Add navigation to your quiz
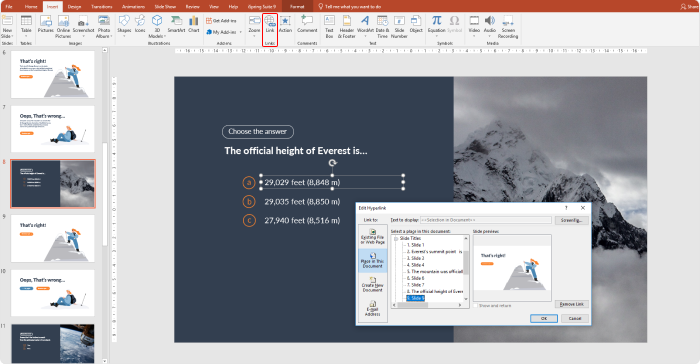
Now it’s time to link the correct and incorrect answer slides to the relevant feedback slides. To do this, click on the Answer Text Box, then go to the Insert tab and tap on Hyperlink. In the open window, choose Place in This Document and select the necessary “That’s correct” or “That’s incorrect” PowerPoint slide.
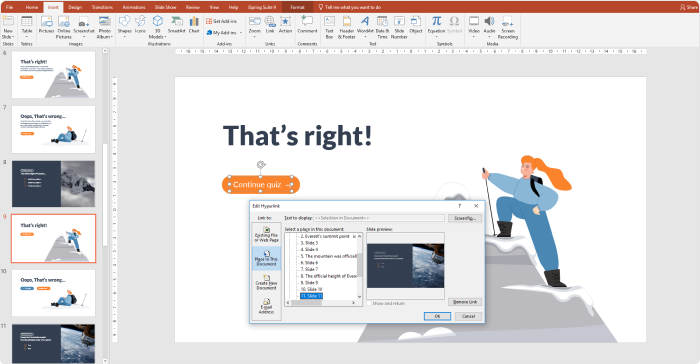
To allow continued navigation from a feedback slide, add a hyperlink to the “Continue” text. Once again, you’ll need to repeat the actions for every single slide, because feedback slides should lead to a new quiz question every time.
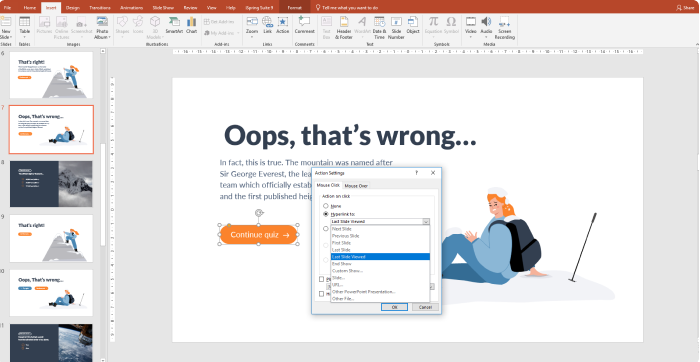
To let your audience return to the question presentation slide, open the slide for incorrect answers and click on the “Try again” text. Add a hyperlink to the question where the learner made a mistake. This time, go to the Insert tab and click Actions. In the opened drop-down menu, select Hyperlink to → Last Slide Viewed. You can see the final result in the slide show mode.
Now our short quiz in PowerPoint is ready.
How to Create an Interactive Quiz in PowerPoint
As you can see, PowerPoint doesn’t provide purpose-built features for quizzes — it can take a while to create quiz question slides, feedback slides for every single answer, and link slides with each other manually. Here are some more things that are missing from PowerPoint:
- It falls short when it comes to creating complex types of interactive quiz questions like drag-and-drop, matching, multiple responses, surveys, and sequence questions.
- It lacks the functionality to track a learner’s progress, such as their completion status or the number of points they’ve scored.
- Monitoring who takes your quiz, their success rate, and analyzing their learning progress isn’t feasible.
- Distributing a PowerPoint quiz also has limitations; it’s not directly shareable on your website, a social media blog, or through email, particularly to individuals who don’t have access to PowerPoint.
Therefore, when you need to build a reliable and interactive quiz that keeps the audience engaged, it’s better to use special authoring tools. Below, we’ll explain and show you how much easier and faster it is to create quizzes with iSpring QuizMaker.
How to Create a Quiz Extremely Fast with iSpring QuizMaker (Method 2)
We decided to improve our Mt. Everest Quiz with iSpring QuizMaker, a simple authoring tool, and this is what we got:
With iSpring QuizMaker, creating a quiz becomes an easy task. The tool provides you with 14 question templates. Read these articles to learn more about some of them:
- How to Create a Multiple-Choice Quiz
- How to Create a True or False Quiz
- How to Make a Matching Quiz in Minutes
- How to Create a Hotspot Question for an Online Quiz
- How to Make a Drag-and-Drop Quiz in 7 Steps
- How to Create a Likert Scale Survey
- How to Create a Fill-in-the-Blank Quiz that Works
- How to Create a Drop-Down Quiz in 7 Steps
Such a comprehensive variety helps gamify the learning process, engage learners and enhance their experience.
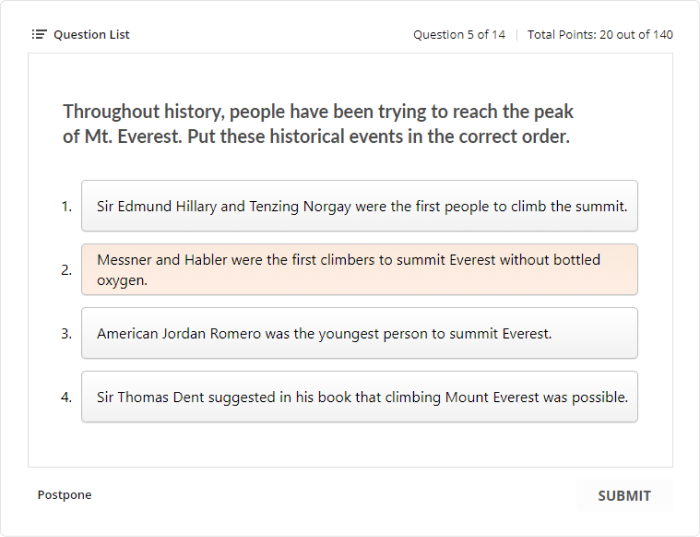
In many situations, knowledge cannot be tested with basic multiple-choice quizzes only. For example, tests on historical topics require an understanding of how events evolved over time. That’s why we included a sequence question in our renewed quiz.
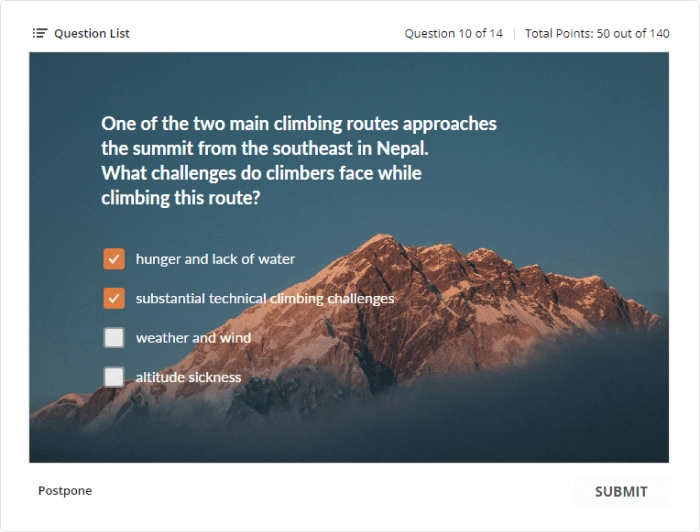
Sometimes more than one key answer should be chosen. These multiple response questions cannot be created with a PowerPoint presentation only. But we didn’t discard the idea, and used iSpring QuizMaker for this purpose.
How to Create a Quiz with a Score in PowerPoint
There are no tests without assessment; that’s why it’s essential that your quizzes evaluate students’ results. As we’ve already mentioned, PPT doesn’t have such features. That’s why we only added a neutral last slide that did not indicate whether the assessment had been passed or failed.

On the contrary, the enhanced Mt. Everest Quiz grades learners’ results and shows their score, both during the assessment and at the end.


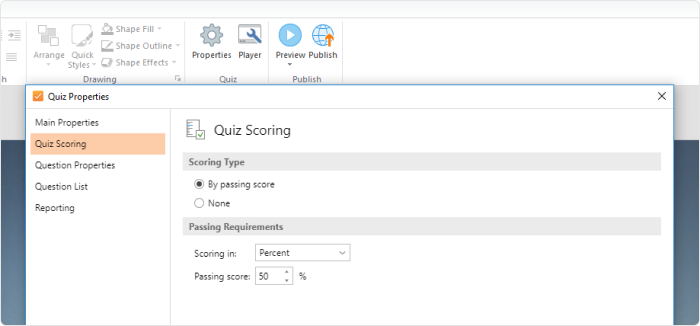
To make your questions gradable, all you need to do is to choose the By passing score under Scoring Type in the Properties dialogue box of iSpring QuizMaker and set the passing score you need. By default, the passing score is 80%.
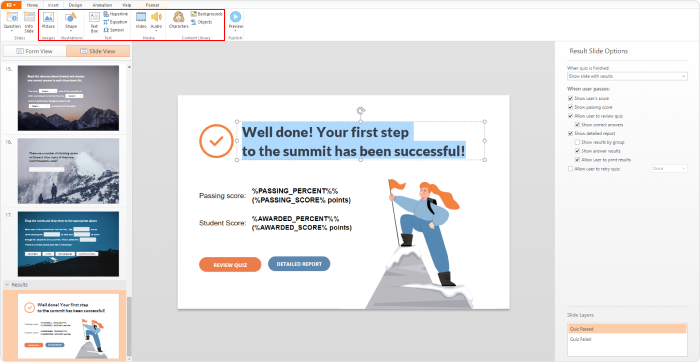
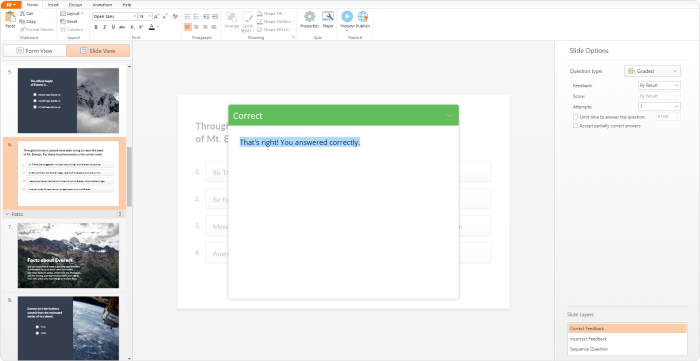
In iSpring QuizMaker, passing result slides are created by default, so there’s no need to add them manually. You can change the slide message according to your personal taste or needs, and add a graphic image or photo, audio or video.
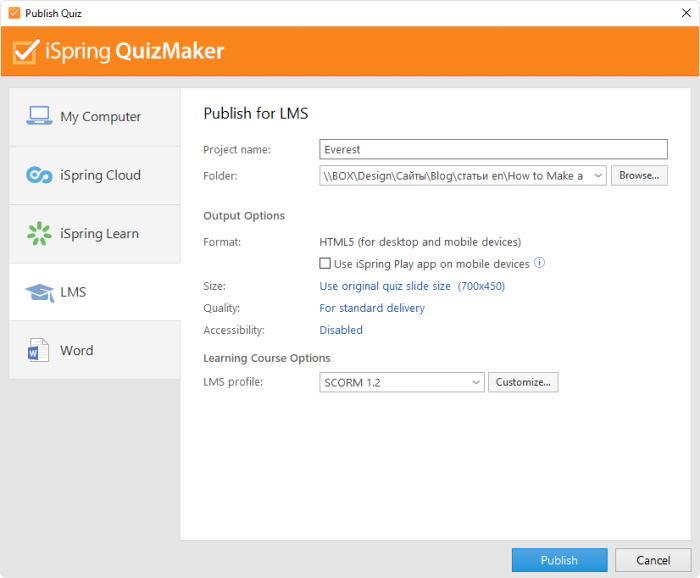
Once you finish, you can choose publishing options. For example, you can publish your interactive quiz to HTML5. This format will ensure that your learners have the best browsing experience, no matter what device they use.
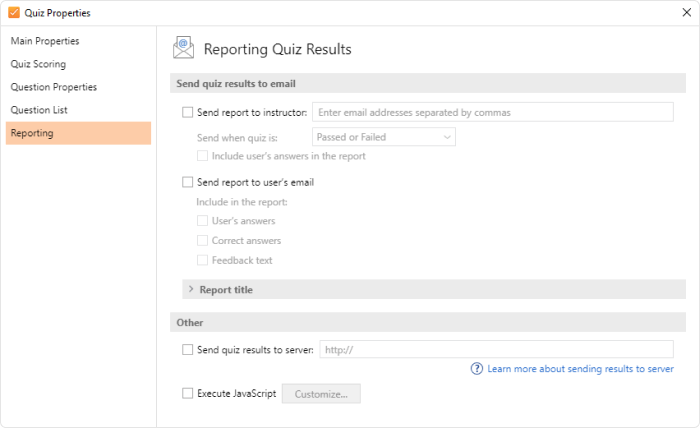
Note: To collect quiz results, you don’t even need an LMS that automatically tracks learner progress. If you don’t use a learning platform, simply choose whether to get results via email or have them sent to your server in the iSpring QuizMaker Properties window.
How to Make Quizzes Cheat Proof
Effective eLearning and eTesting are all about the details. iSpring QuizMaker provides authors with additional capabilities, but remains completely easy to use. Let us share a couple of tips on how to squeeze more out of it.
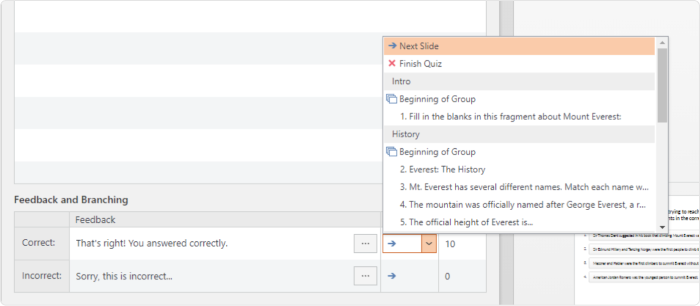
For example, you can set the options like assigning scores and penalties for individual questions or shuffling answer options to keep students on their toes. You can also set the number of attempts allowed and limit the time to take the test in order to prevent learners from cheating or searching for the answer choices online.
Note: iSpring QuizMaker also provides you with extended editing options, so you can get creative and change the design of all the slides or experiment with typing fonts.
To dive deeper into the process of creating assessments, read our post about how to make online quizzes.
Download a PowerPoint Quiz Template
While making a quiz in PPT is an option, its functionality is limited, and it can be very difficult to create. With this classic software, you can only add multiple-choice quizzes to your PowerPoint slide deck. Download the Mt. Everest Quiz source file to repeat the same steps mentioned earlier and practice creating quizzes in PowerPoint.
To author an interactive assessment that really tests students’ knowledge and engages your audience, more innovative software is required. Try iSpring QuizMaker for free and start creating engaging interactive quizzes in PPT right now.
Create interactive quizzes for learning, knowledge checks, and skill practice


