How to Create a Graded Quiz

To create a graded quiz most often means to create an effective assessment on how users learned the material correctly. Graded quizzes have an element of challenge and help learners to prove their competence and knowledge by achieving good results.
In this article, we’ll show you how to create a graded quiz using iSpring Suite.
Here’s an example of what you can build with the tool.
Step 1. Install iSpring Suite
With iSpring Suite, you can start creating pro-looking interactive courses and quizzes quickly without the help of designers or programmers. During the 14-day trial period, you can build an unlimited number of assessments and use all of the tool’s capabilities to the fullest. Just download iSpring Suite and install it.
Step 2. Create a Graded Quiz
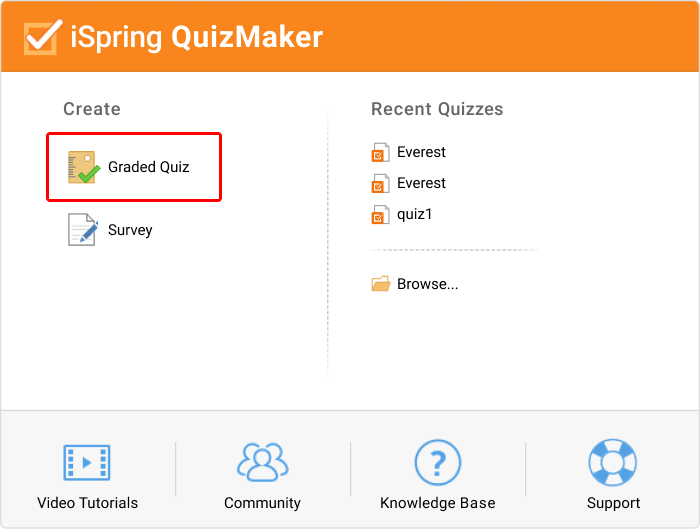
In the Quick Start menu, click on Quizzes and select Create Graded Quiz. Then click on Graded Quiz.
Step 3. Choose a Question Type
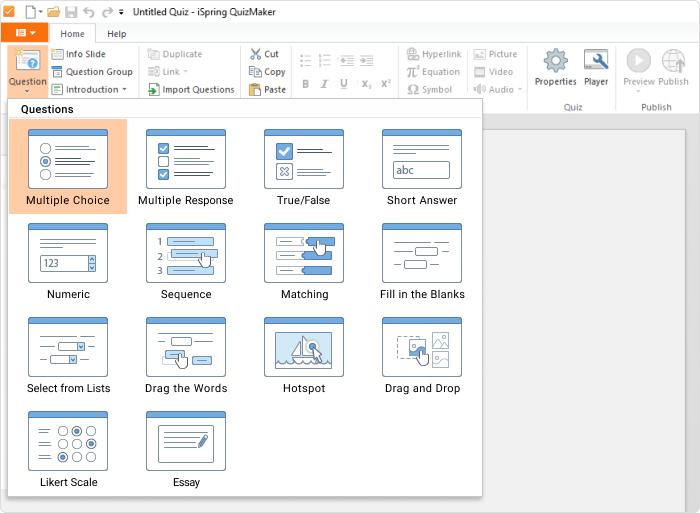
iSpring Suite has 14 types of questions. To select the type you need, click the Question tab.
Step 4. Add a Question Text
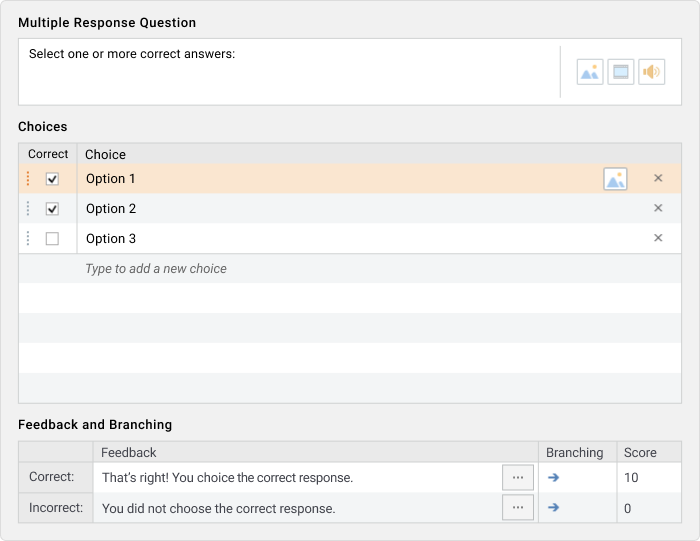
We chose the Multiple Response question type, as an example. Enter a text in the question field and add answer options in Choices. Mark the correct answers with a check mark. Add other questions the same way.
Step 5. Set Scoring Parameters
In iSpring Suite, you can set different scoring parameters, depending on the results you are looking for.
Set general scoring parameters
If you need to assign a more typical scoring approach for your quiz, go to the Properties menu in the ribbon and select the Quiz Scoring tab.
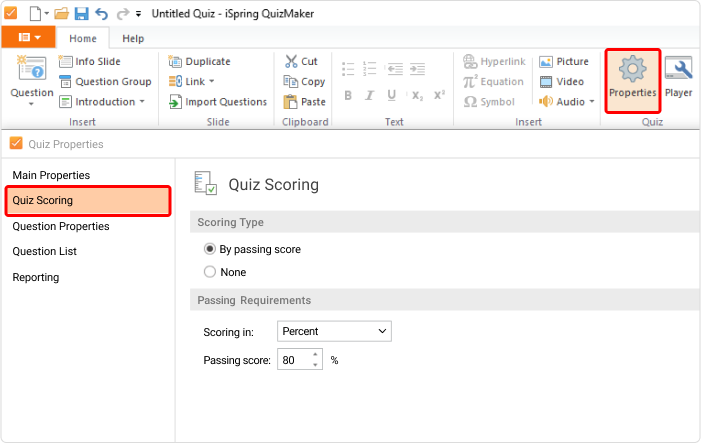
Here you can choose scoring parameters and set the requirements for passing the quiz. Your quiz can be scored by percentages or points.
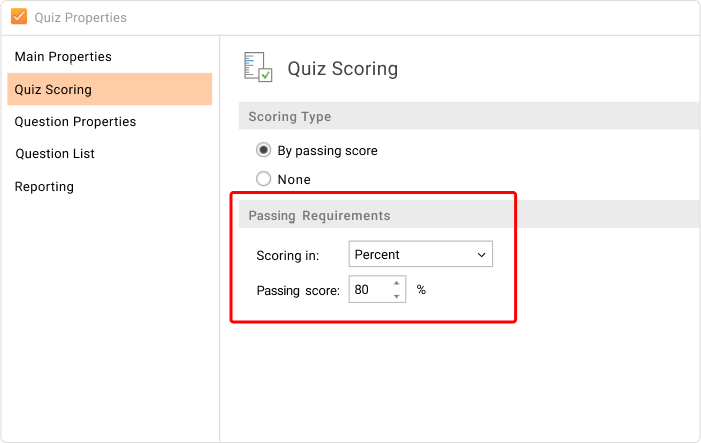
Don’t forget to click Save after you make changes.
Set equal scores for each quiz question
If you need to set the same scoring parameters for each quiz question, go to the Properties menu in the ribbon and select the Question Properties tab.
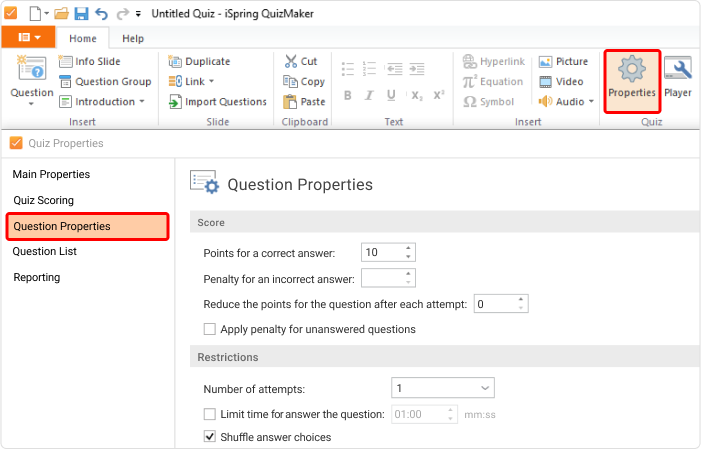
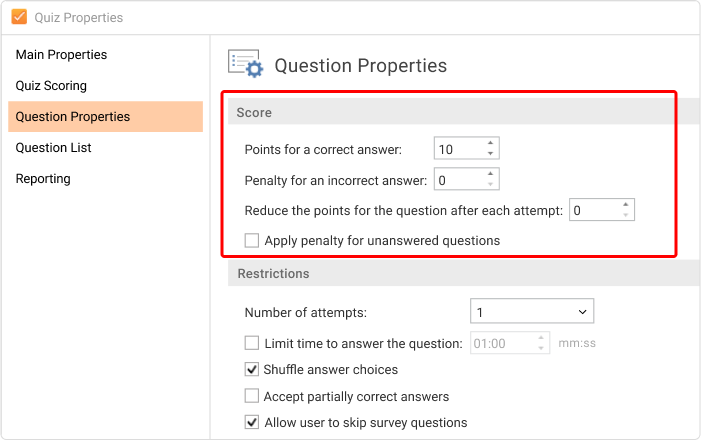
In the Score section, you can set up points for correct answers and penalties for incorrect answers, and also reduce points after each unsuccessful attempt in questions that allow multiple attempts.
If you want to allow unanswered questions to affect the overall score, tick Apply penalty for unanswered questions.
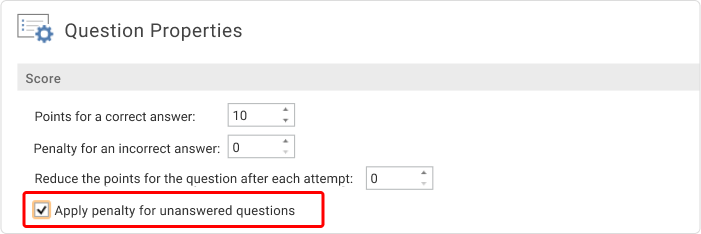
Don’t forget to click Save after all modifications.
Set custom quiz points for each question
Аs mentioned earlier, iSpring Suite has 14 question types, so they vary in complexity. In this case, you have the ability to set custom scoring for each quiz question.
Choose a question and go to the Feedback and Branching section in the bottom right corner. Here, in the Score column, assign an appropriate number of points for the question.

Note: You can also both award points for correct answers and subtract for incorrect ones.
For example, for true/false questions, you can set it up to add 10 points for the correct answer and subtract 5 points for the wrong answer.
Step 6. Publish Your Quiz
iSpring Suite offers several ways to publish your quiz, depending on your requirements. If you want to publish your test to a website or a blog, choose the HTML5 output.
First, click the Publish button on the toolbar, and then, in the My Computer tab, add the name of the project, its location, and click on Publish:
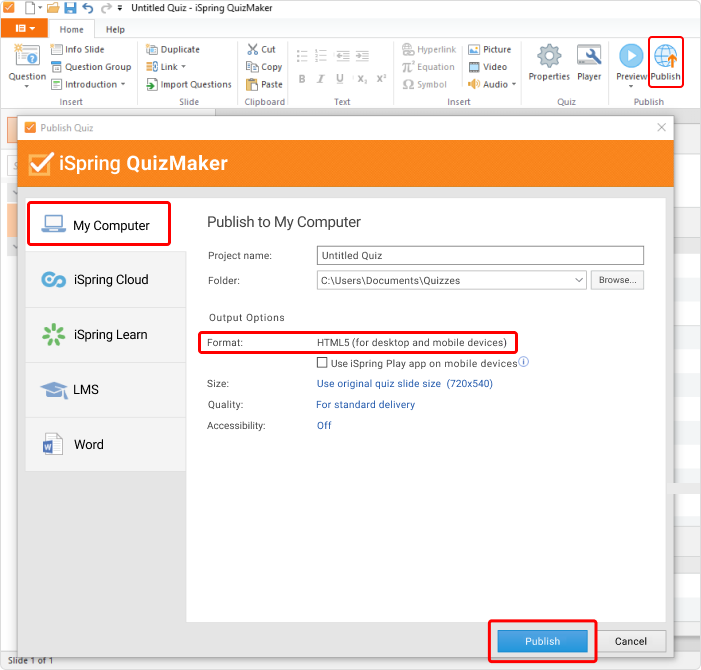
There are 3 more publishing destination options:
- LMS: choose this tab if you want to upload your quiz to a learning management system. iSpring supports SCORM, xAPI (Tin Can), AICC, and cmi5 eLearning formats.
- iSpring Learn: here you can publish your quiz directly to your iSpring Learn LMS account.
- Microsoft Word: choose this tab if you need a test in a printable format.
Try to create quizzes with a score using iSpring Suite. Just download a free trial here and build your own graded quiz.
Create interactive quizzes for learning, knowledge checks, and skill practice


