How to Create an Employee Training Video: A Practical Guide & Tips

From cooking shows on TV to Photoshop tutorials on Youtube — training videos are everywhere. They hold a strong position in corporate training too. 76% of employees working in organizations of different sizes in diverse industries believe that training videos are an effective way to ensure the retention of new knowledge. Do you know why?
The thing is, when you watch a video, you’re more than simply a spectator. You are in the action, so you can easily perceive the information and keep it in your memory for longer.
In our blog, we’ve already talked a lot about using video for corporate training. For example, we provided a detailed guide on how to record screencasts and walked our readers through the process of tutorial video production. In this article, we’ll share our ideas on how to create presenter-style training videos on your own and provide you with 6 tips on how to make them even more effective.
Here’s what you’ll learn in greater detail:
- What is a Training Video?
- Why Create Training Videos?
- What are Presenting-Style Training Videos?
- Equipment Needed to Record Employee Training Videos
- Software for Training Video Creation
- A Step-by-Step Guide on How to Create an Effective Training Video
- Tips for Making More Effective Training Videos
What Is a Training Video?
A training video is a video that provides applicable knowledge. Chances are you’ve found yourself wondering how to do something new correctly and turned to YouTube for some quick help. With training videos, you can learn some needed information that has been studied, gathered, and presented by other people. Watching a video is a simple way to gain new knowledge and then go into more detail through reading if needed.
You might be thinking, “It’s pretty clear why people watch videos. But why would I make them in the corporate sphere?” We’ll explain why.
Why Create Training Videos?
Using videos for employee training might be a good solution for the following reasons:
- Video is more compelling and engaging than texts. It combines sound and picture and involves more of our senses. Even a short training video added to a course can make it more vivid and consequently more engaging.
- Training videos improve knowledge retention. A study conducted by the SAVO group confirmed that presenting learning materials visually increases knowledge retention by up to 65 %.
- Videos can be accessed anytime and anywhere. To find the solution to a problem, learners often consider it more practical to refer to a short video on a mobile device rather than a book. For example, they can watch it on their smartphones in the subway, during a break from work, or while cooking or doing housework.
- Videos can reduce training costs. With a recording, it’s possible to make training replicable for internal use. This is especially important for large companies with geographically dispersed teams. Video training will help them reduce repetitive instructor fees and other costs: there will be no need for venue, travel, and accommodation expenditures for training.
A variety of training video formats can be used: demonstrations, screencasts, video lectures, presenter videos, and more. Since presenter-style training videos serve as a bridge between instructor-led training and eLearning, we’ll elaborate on them for you in this article.
What Are Presenter-Style Training Videos?
A presenter-style training video shows a person who addresses the audience directly through the camera as if they were face to face. These videos can be used to provide the same information that is typically delivered during classroom sessions. For example, they can be of great use when you need to deliver instructions to the entire staff or inform them about a new product.
For example, Moz.com uses presenter-style videos for the Whiteboard Friday series, where they share tips on how to maximize SEO performance.
Benefits of presenter-style training videos
These are the three main benefits of presenter-style training videos:
- They are personable and provide a sense of credibility to the audience.
- They’re engaging, especially if the presenter uses storytelling, humor, and other techniques to keep learners interested.
- They don’t require special skills or much time to produce.
We’ll guide you step by step through the process of filming a presenter-style video. But first, let’s discuss what equipment and software you need to excel in it.
Equipment Needed to Record Employee Training Videos
It was previously thought that professional video cameras, or at least camcorders, were necessary for video recording. A person would set up a camera and try to get the right position standing in front of it. This still works today.
As for the audio, it takes some effort to record audio with proper quality. It’s better to use separate audio equipment — at least an external microphone. A lavalier microphone will be most appropriate for this type of training video. It’s clipped onto a presenter’s clothes to amplify their voice and can be hidden from view.
Training Video Software
Preparation for recording is essential to make post-production smoother — proper editing tools will do the rest. That brings us to the software for training video creation. We’ve collected five all-in-one tools to facilitate the recording and editing process for all types of users.
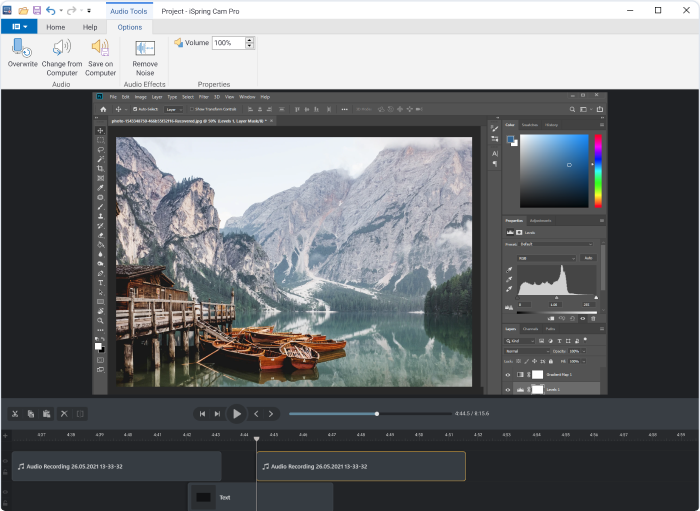
iSpring Cam Pro
iSpring Cam Pro will be perfect for YouTube video tutorials. It’s a full-fledged studio where you can record any type of professional training video and software tutorial. Change the speed, annotate, and edit training videos easily before uploading them to your LMS or YouTube channel right from the software interface.
iSpring Suite
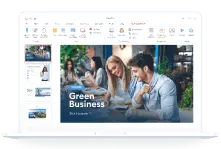
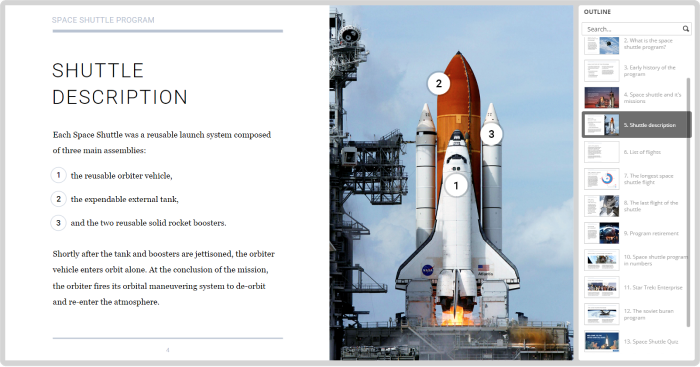
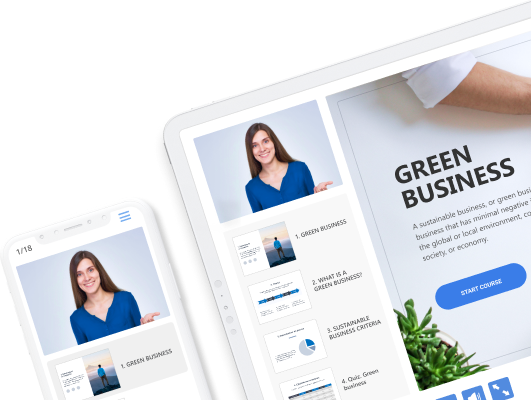
iSpring Suite is an authoring toolkit for creating online courses. If you want to engage your online learners not only with video, but with interactive courses as well, this will be a perfect pick. The toolkit has capabilities equal to those of Cam Pro and includes great features for interactive course building. With iSpring Suite, you can make courses with dialogue simulations, interactive activities, drag-and-drop quizzes, and more, and save courses as videos or other eLearning formats.

Check out this demo to see what an eLearning course in iSpring Suite looks like:
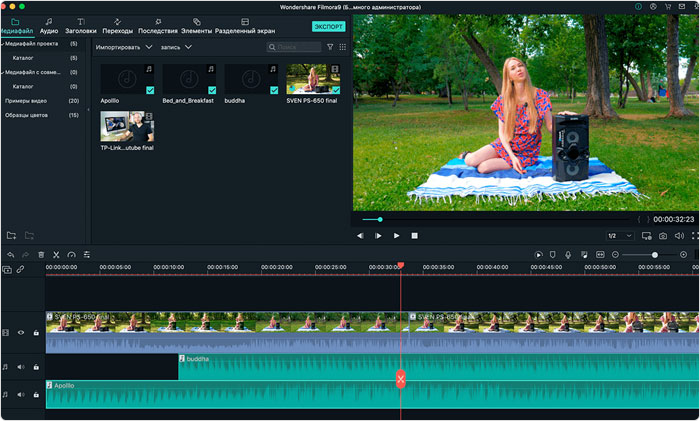
FilmoraX
FilmoraX is software that simplifies advanced video editing for novices. It enables you to manage narration speed, fix camera shakes, change backgrounds, and create custom animations, split-screen videos, stop motions, and add other effects.
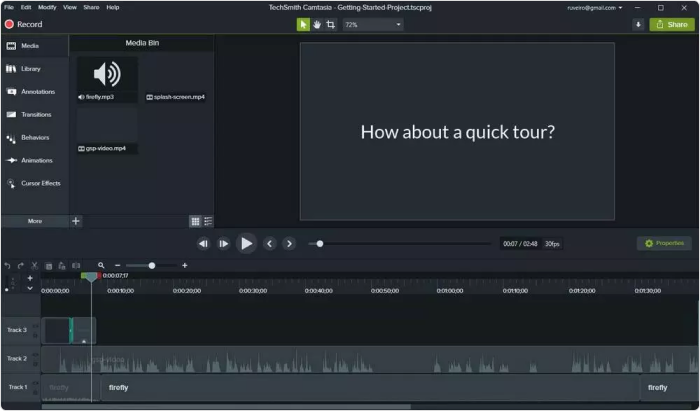
Camtasia
Camtasia is a smart choice for video screencasts and software demos. It’s a straightforward yet powerful screen recorder and video editor that also facilitates audio narration editing, adding sound effects, and including royalty-free music.
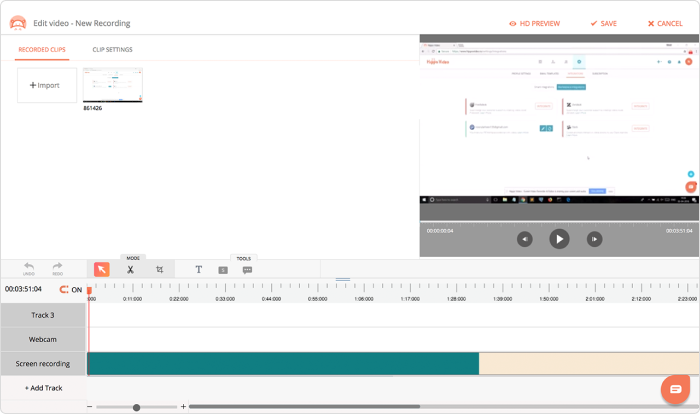
Hippo Video
Hippo Video is a comprehensive tool that can record your video and audio in HD and place it anywhere on the Internet. It has a full set of helpful editing features like annotations, callouts, tags, and highlighted mouse clicks. Moreover, it excels in video reporting: you can learn who are your viewers, where and how they watch your video, and their likes or dislikes.
How to Create an Effective Training Video with iSpring Suite
As mentioned, a training video can be made in a snap with an easy-to-use tool like iSpring Suite. If you still don’t have it, you can download it for free now. Keep reading to find out how to film a training video with our step-by-step instructions.
Step 1. Prepare all the materials
The first thing you need to do is write a script or at least make a list of the key talking points to reference when you’re recording. Also, prepare PowerPoint slides, images, demos, and other content items that you’re going to use while capturing a video.
Step 2. Set up the recording environment
iSpring Suite allows you to record video with minimal equipment — you just need a computer with the best training video software, a microphone, and a USB webcam, or simply a laptop with a built-in mic and camera. When you open the video recorder, it will automatically detect any connected devices.
After you connect the audio and video feeds, prepare your computer for smooth function. Close the apps that are not involved in the recording process, especially those that show alerts or popups.
Step 3. Make a test recording
After you install iSpring Suite, double-click on its icon on your desktop. In the Quick Start window, select the Screencasts tab. Choose New Recording in the Create section.
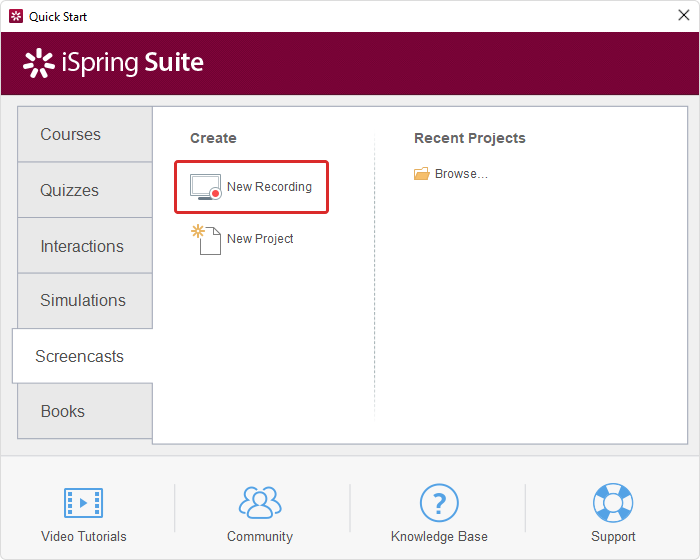
iSpring will ask what you want to record: screen, camera, or both screen and camera at the same time. Since we’re going to make a presenter-style video, we’ll guide you through the key steps on how to record through webcam.
In the Recording Settings window, choose the Camera mode and customize the additional options.
- You can change the video size in the Preset drop-down menu.
- You can also choose the mic that will be used during recording in the Microphone menu. The mic is on by default, but you can turn it off, if necessary, by clicking the speaker icon.
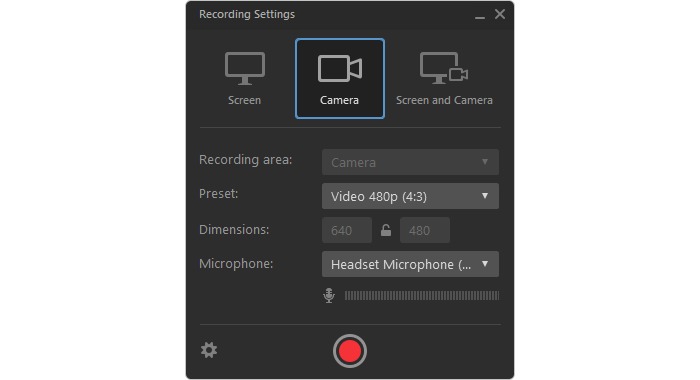
After you’re done with the webcam and microphone settings, click the red button to do a quick test.
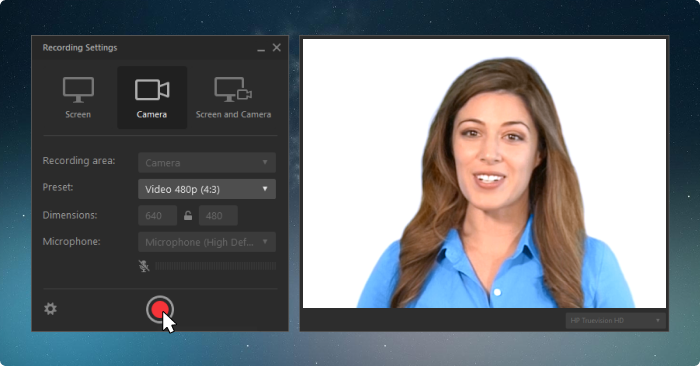
Record for a few seconds while talking. Then, click Stop or press F10 on your keyboard to finish the recording.
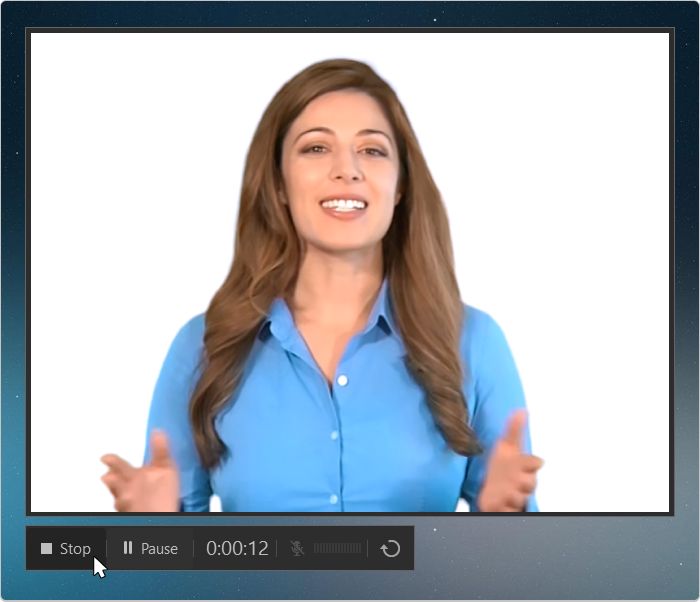
Play the video back to check whether the recording looks and sounds good.
Step 4. Record your training video
If everything works as it was supposed to, you can start recording your training video. Do a quick run-through of your script/talking points, adopt the right posture, and click the Capture button. Pause recording as needed and stop it when you have finished presenting.
NOTE: If you make a mistake, continue recording. Simply take a breath and start from the place where you stumbled. You’ll be able to cut out the mistakes you’ve made later.
Step 5. Edit your training video
After you stop your recording, the video will open in the iSpring Cam Pro editor, where you can easily do all the basic editing.
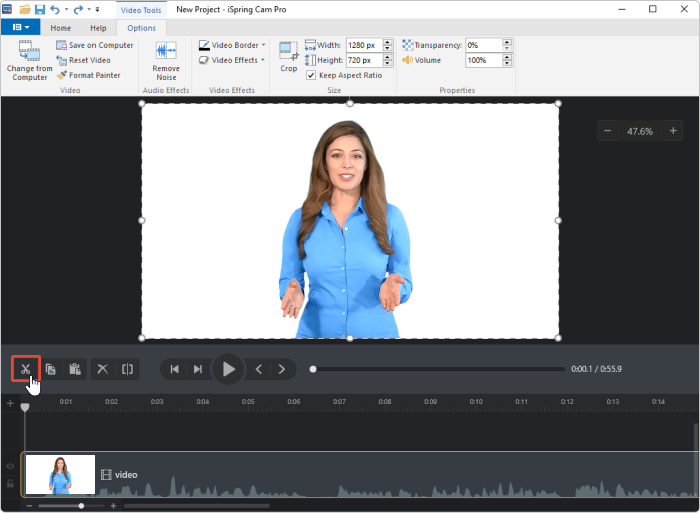
Start editing the video by trimming out the unwanted parts. Use the scissors icon to cut fragments where you misspeak or cough out of the timeline section.
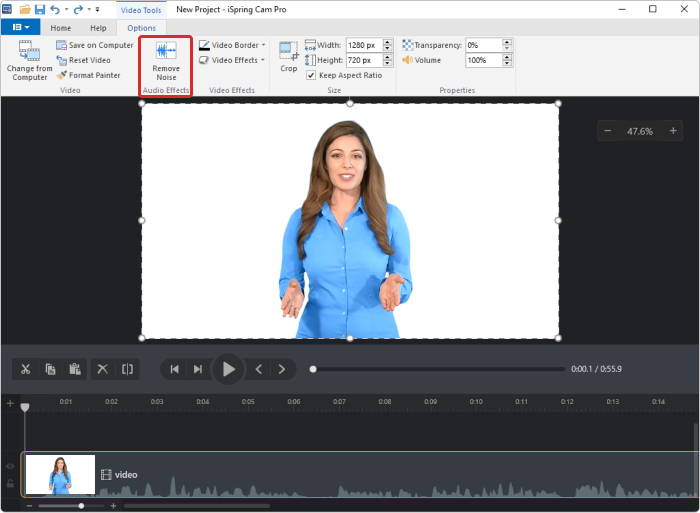
You can also remove background noise throughout the entire recording by hitting the relevant button on the iSpring Camp Pro toolbar.
With a fully cleaned-up timeline, you can move on to the fun part: adding other kinds of content. iSpring Suite allows you to insert pictures, infographics, animations, and text.
If you are adding pictures or other visuals into your training video, or want a smoother cut from one shot to the next, you need to add transition effects. To apply a selected transition effect, drag and drop it on the clip in the timeline.
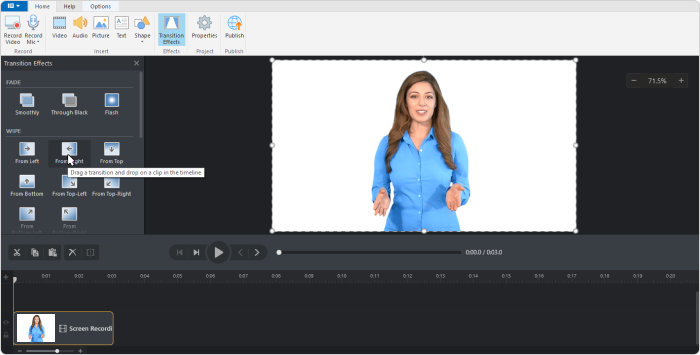
You can also enhance your training video by adding music to the background or just insert it at the beginning and end of the video to engage your audience.
Once your video is ready, you can start training your employees. To make your video available for colleagues, upload it to YouTube/Vimeo or to your LMS. By using an LMS, you’ll be able to keep track of how your employees are learning.
6 Tips for Making More Effective Training Videos
Do you want to make your training videos even more effective? Here are the top 6 tips we’ve compiled for you to get what you need.
Tip 1. Connect with your learners
If you want to achieve good training results, the first thing you need to do is connect with your learners on an emotional level. Effective communication (even if it is one-way communication) begins with knowing your audience and speaking their language. So, before developing a training program, explore who your learners are —- what is their average age, educational level, position, and the like? Pay attention to how your employees speak and then, while recording a video, try to copy their manner of speech and use their words.
In fact, the way you look matters on video. Your appearance, including clothing, should match the expectations your learners have of a person in your position. For example, it’s essential for the presenter to be dressed in scrubs if you are recording a video for medical staff. And if you’re training factory employees, you’re likely to choose a uniform.
In general, the presenter’s overall image should be neat and not too eye-catching. Here are some things you’d best avoid when presenting on camera:

Tip 2. Keep your videos short
People have quite short attention spans, and you need to keep this in mind when creating training videos. Research conducted by MIT showed that the optimal video length should be under 6 minutes. Videos longer than 6 minutes were found to result in remarkable viewer attrition. So, if you have a lot of information to share with your learners, break it into video lessons of under 6 minutes each.
For example, La Sonanta used this tip when developing a training program to help people learn how to play a Flamenco guitar. Instead of recording long exhausting videos, they made a series of lessons with closeup shots to show how to keep your fingers on the guitar.
Tip 3. Use the Rule of Thirds
Whenever you’re recording a training video, remember the “Rule of Thirds”. Mentally divide your shot into nine equal parts by two horizontal lines and two vertical lines like this:
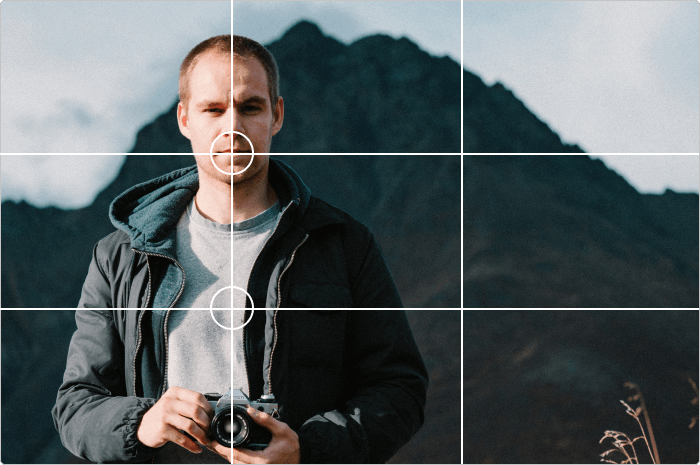
This technique is used to draw the viewer’s attention to the main point of interest in the shot.
You need to align the key subject (in our case, the presenter) in the image according to this grid — at the ‘power points’ where the lines intersect. The lines on the 3×3 grid are the points upon which our eyes automatically fix. Putting the main focus along this grid results in a more aesthetically pleasing shot and makes it easier for the eye to “read” the information.
Tip 4. Use a clean background
Nothing looks less professional than a messy or distracting background in the video. When choosing a shooting location, opt for a solid-colored background. It may be a wall, backdrop paper, or even a bedsheet. Make sure that there’s no window or another reflective surface in the background. Otherwise, you can catch the camera in the reflection or have a presenter look dark and shadowy.
It’s also a nice idea to record a training video in a “professional” environment: the place where you actually work. For example, if you’re going to train customer service agents, it’s reasonable to shoot a video within the walls of your office. If your audience is car dealership staff, you may want to film right in your car service department.

Shooting a training video in a “professional” environment makes it look more credible for learners.
Tip 5. Add annotations
Annotations help to grab the attention of viewers and keep them engaged. Here are some helpful insights into making annotations:
- Every training video should start from a title that tells the audience what you’re going to talk about and end with a closing graphic that ties the whole piece together.
- You can use subtitles for those who prefer to watch videos with the sound turned off.
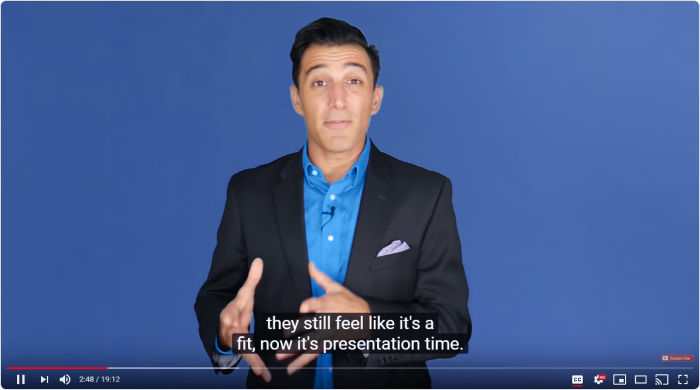
Subtitles can also help to find specific places in a video without watching it from the very beginning.
- You can add captions to highlight the main ideas when presenting, for example, outline the steps.

This simple trick will help learners memorize key messages easier.
- You can use bullet points to list some rules, techniques, or other important points. It also will help you focus the viewer’s attention on important information.

Bullet points are also good for recaps.
Tip 6. Combine training videos with other learning activities
Educators around the world encourage involving students in various learning activities because it helps to keep them focused. This idea works not only for children, as some of you may think, but for adults as well.
You can make training much more engaging and, therefore, more effective if you combine, for example, video-based learning and training through online courses and quizzes. Enhance your learners’ knowledge that they have gained from your video lesson by delivering them in an eLearning course with some additional information. Or perform a knowledge check after they have watched a video with the help of an online test or quiz.
To create courses and assessments, as well as training videos, you only need the iSpring Suite authoring toolkit.
Final Thoughts
We hope this article has given you some ideas on how to record a training video with no video production experience and suggest you include presenter-style videos as a part of video training. They don’t require much time but will improve your employees’ learning experience. If you have questions about any of the points in this article, please let us know in the comments.
Useful Resources
- How to Make How-to Video
- Best Screen Recording Software
- Best 38 Training Video Software
- Video Tutorial Software
- How to Make Tutorial Video
- Talking Head Videos
- Best 20 Explainer Video Software
- How to Make a Screencasts
- How to Create Instructional Video
- How to Convert PowerPoint to MP4 Video on Windows & macOS
- How to Add Narration to a PowerPoint Presentation
